General Flow

1. Create Account
The flow begins with account creation, where an owner address is submitted to initialize the smart contract wallet. At this stage, the account exists but remains in an inactive state. While the account exists in the system, it cannot yet execute any user operations or interact with the blockchain. Create account by calling the API.
2. Top Up Gas Tank
Before activating the account, the gas tank must be funded.
3. Activate Account
Once the gas tank is funded, the account can be activated. This process deploys the smart contract wallet on the blockchain. After activation, the account is ready to execute user operations, interact with dApps, and utilize all features of account abstraction.
Detailed Flows
1. Top Up Gas Tank
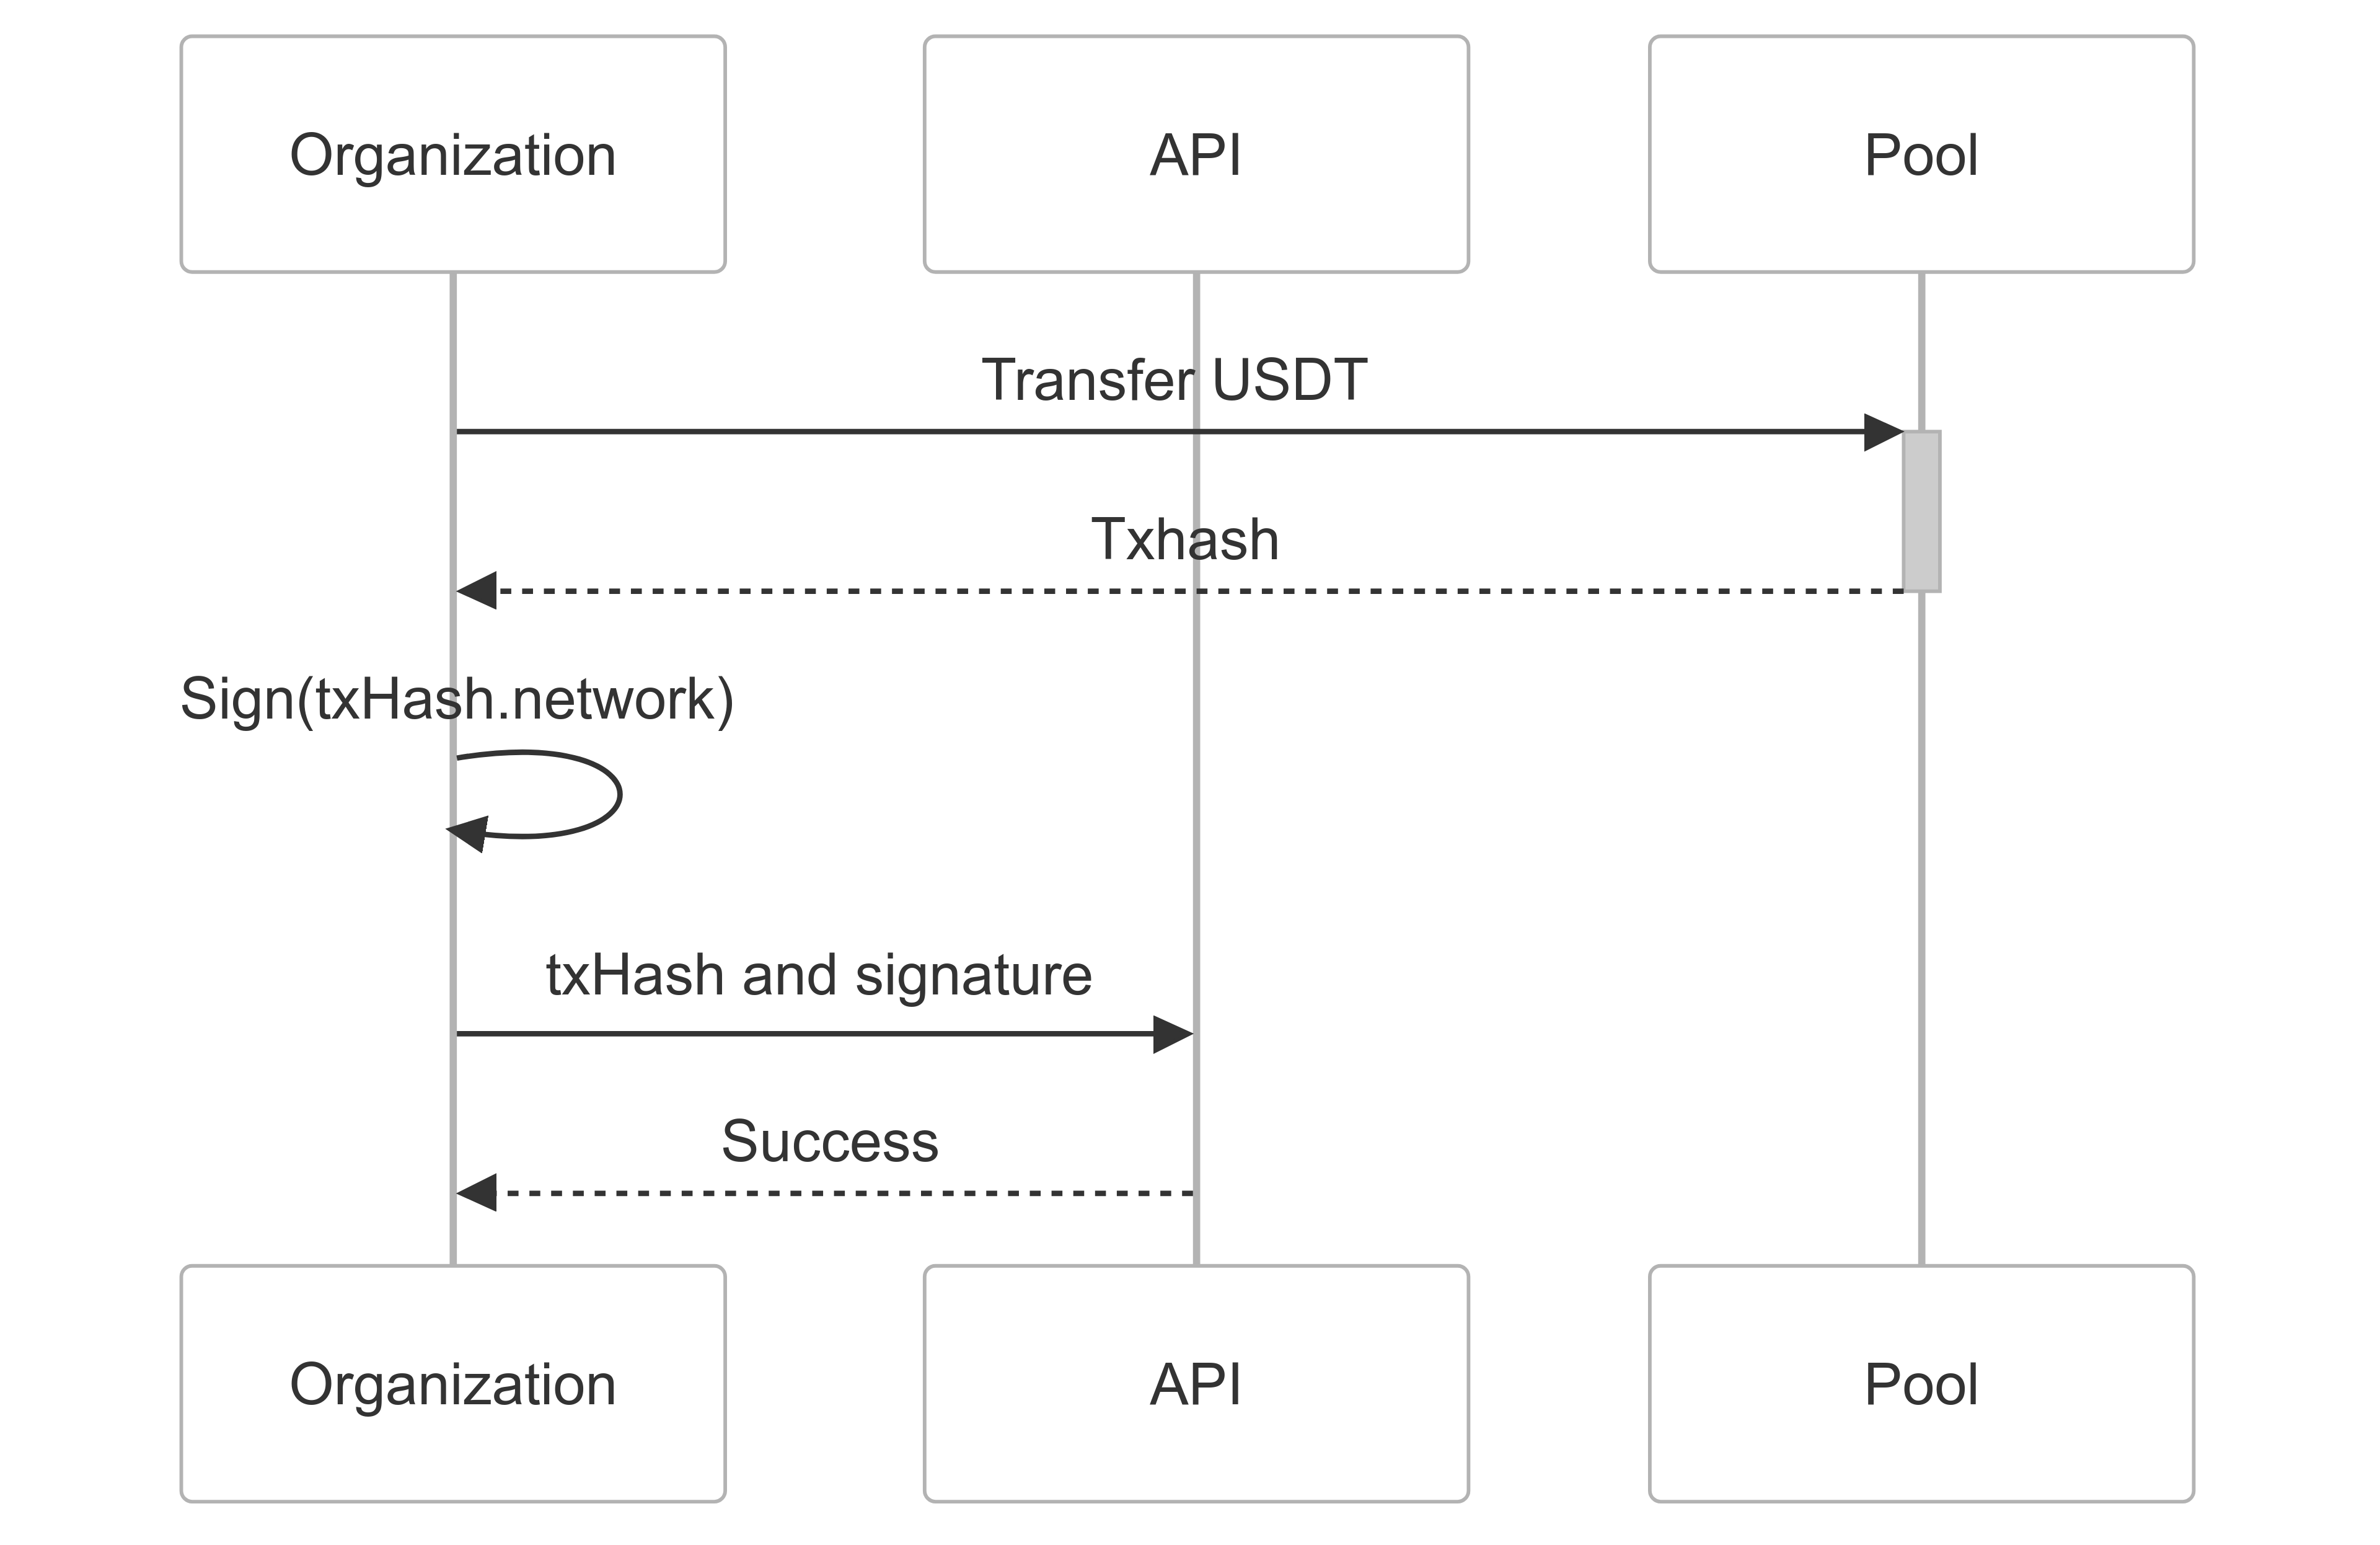
The process for topping up the gas tank involves the following steps:
-
On-Chain USDT Transfer
- Organization transfers USDT to the Xellar pool contract on the respective network
- This is currently the only supported top-up method
-
Message Signing
- After transfer, organization must sign a message using personalSign
- The signing wallet must be the same one used for the USDT transfer
- Message format:
${chainId}.${txHash} - Example: If chainId is 137 and txHash is "0x123...", message would be "137.0x123..."
-
Top Up Submission
- Submit both the signature and transaction hash to the API
- Organization can specify whether to top up:
- Individual gas tank
- Organization gas tank
-
Important Notes
- Each transfer transaction can only be used once for top-up
- The signature must come from the wallet that executed the USDT transfer
- Invalid signatures or reused transactions will be rejected
2. Activate Account
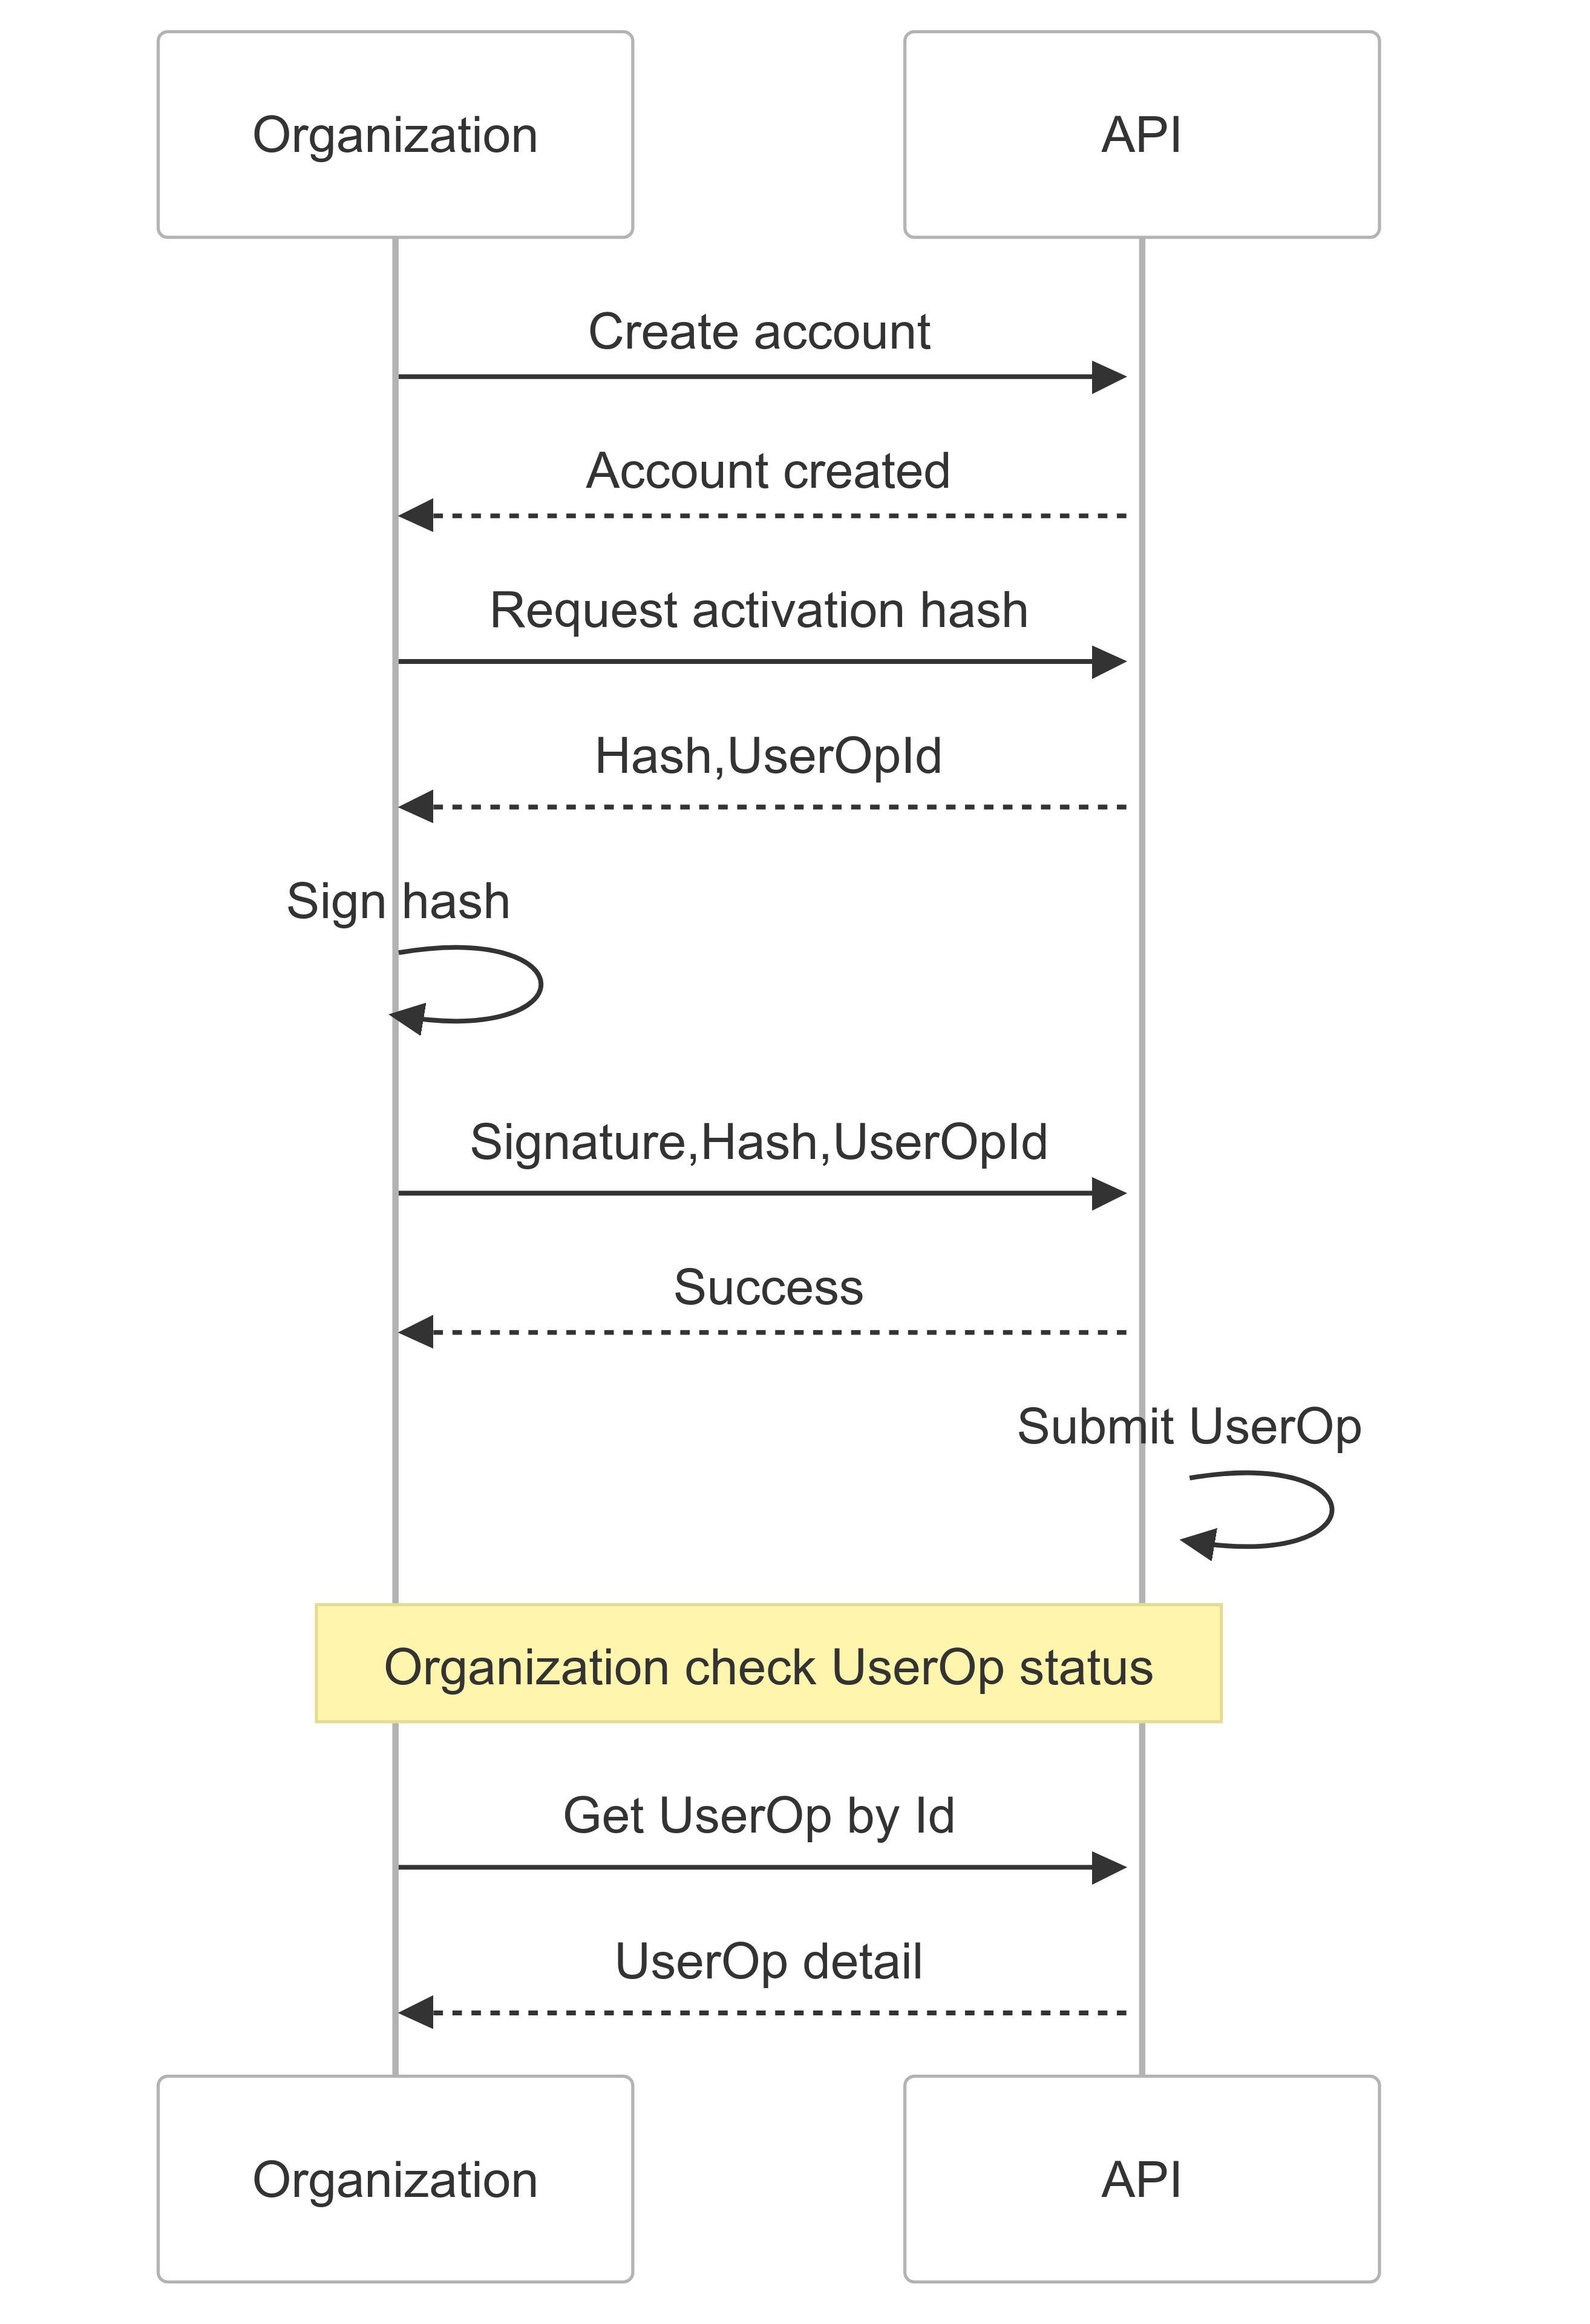
The process for activating an account involves the following steps:
-
Request Activation Hash
- Call the API to request an account activation hash
- API returns:
- Hash that needs to be signed
- User operation ID for tracking
-
Sign the Hash
- Owner must sign the activation hash using personalSign
- The signing wallet must be the owner address used during account creation
-
Submit Activation
- Submit to the API:
- Original hash
- User operation ID
- Owner's signature
- Submit to the API:
-
Monitor Activation Status
- Check account status periodically through the API
- API will indicate when activation is complete
- Once activated, the account can execute user operations
-
Important Notes
- Activation requires a funded gas tank
- Only the owner address can sign the activation hash
- Invalid signatures will cause activation to fail
- Account must be fully activated before executing operations
3. Execute User Operation

The process for executing a user operation involves the following steps:
-
Request Operation Hash
- Call the API to request a user operation hash
- Available user operation types refer to API documentation
- API returns:
- Hash that needs to be signed
- User operation ID for tracking
-
Sign the Hash
- Owner must sign the operation hash using personalSign
- The signing wallet must be the owner address of the account
-
Submit Operation
- Submit to the API:
- Original hash
- User operation ID
- Owner's signature
- Submit to the API:
-
Monitor Operation Status
- Check operation status periodically through the API
- API will indicate when operation is complete
- Transaction hash will be provided once confirmed
-
Important Notes
- Account must be activated before executing operations
- Only the owner address can sign operation hashes
- Invalid signatures will cause operations to fail
- Sufficient gas must be available in the gas tank
4. Sign Message and Typed Data
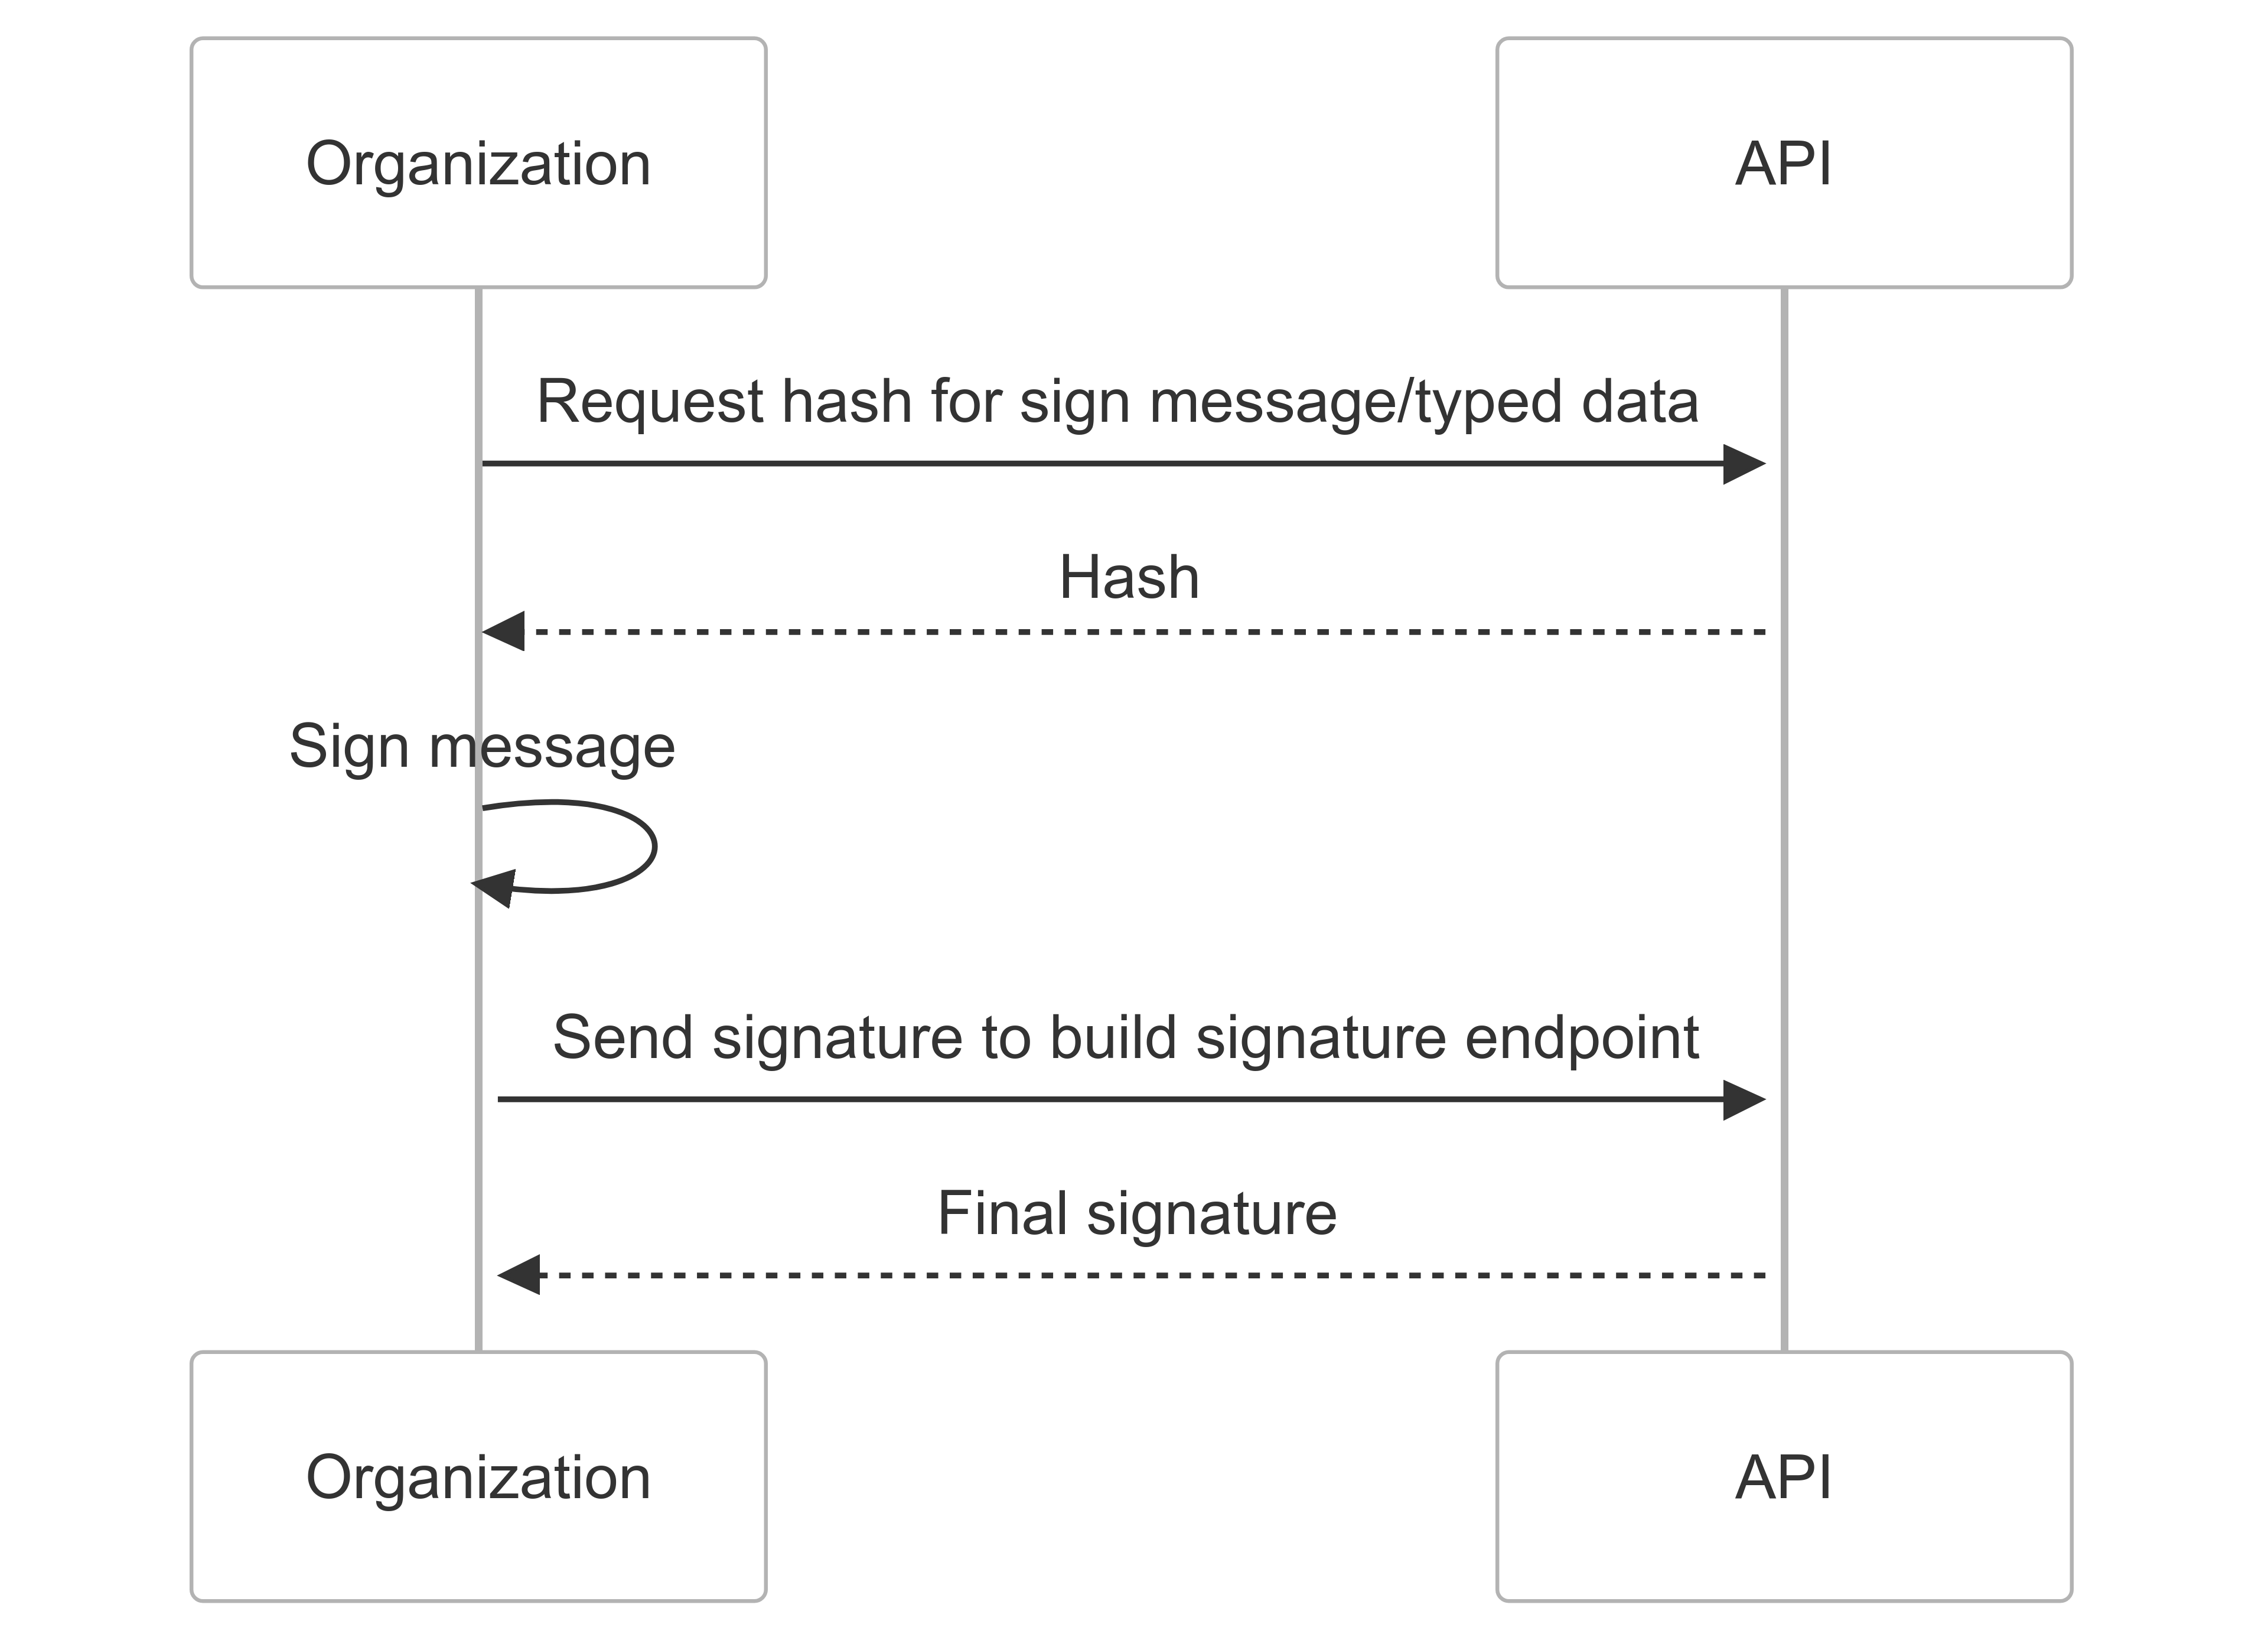
Xellar's implementation of smart accounts uses the ERC1271 standard. This means that organizations need to craft a signature before it is considered valid by the smart account's isValidSignature function. Signing messages is available even when the account is not activated yet.
Steps for Signing a Message or Typed Data
- Request the Hash: When required to sign a message or typed data, the organization should first request the hash from the API.
- Sign with the Account Owner's Private Key: Use the account owner's private key to sign the hash.
- Build the Final Signature: Call the
buildSignatureAPI to receive the final valid signature.
Important Notes
- The signing process is available even if the account is not yet activated.
- Ensure that the correct private key is used for signing to avoid invalid signatures.
- The final signature must be built using the
buildSignatureendpoint to be recognized by the smart account.