User Operation
1. What are User Operations?
The available user operations are:
- Send Token (ERC-20)
- Send Native Coin (ETH, MATIC, etc.)
- Send NFT (ERC-721)
- Send NFT (ERC-1155)
- Sign Transaction
- Activate Account
2. How To Execute User Operation
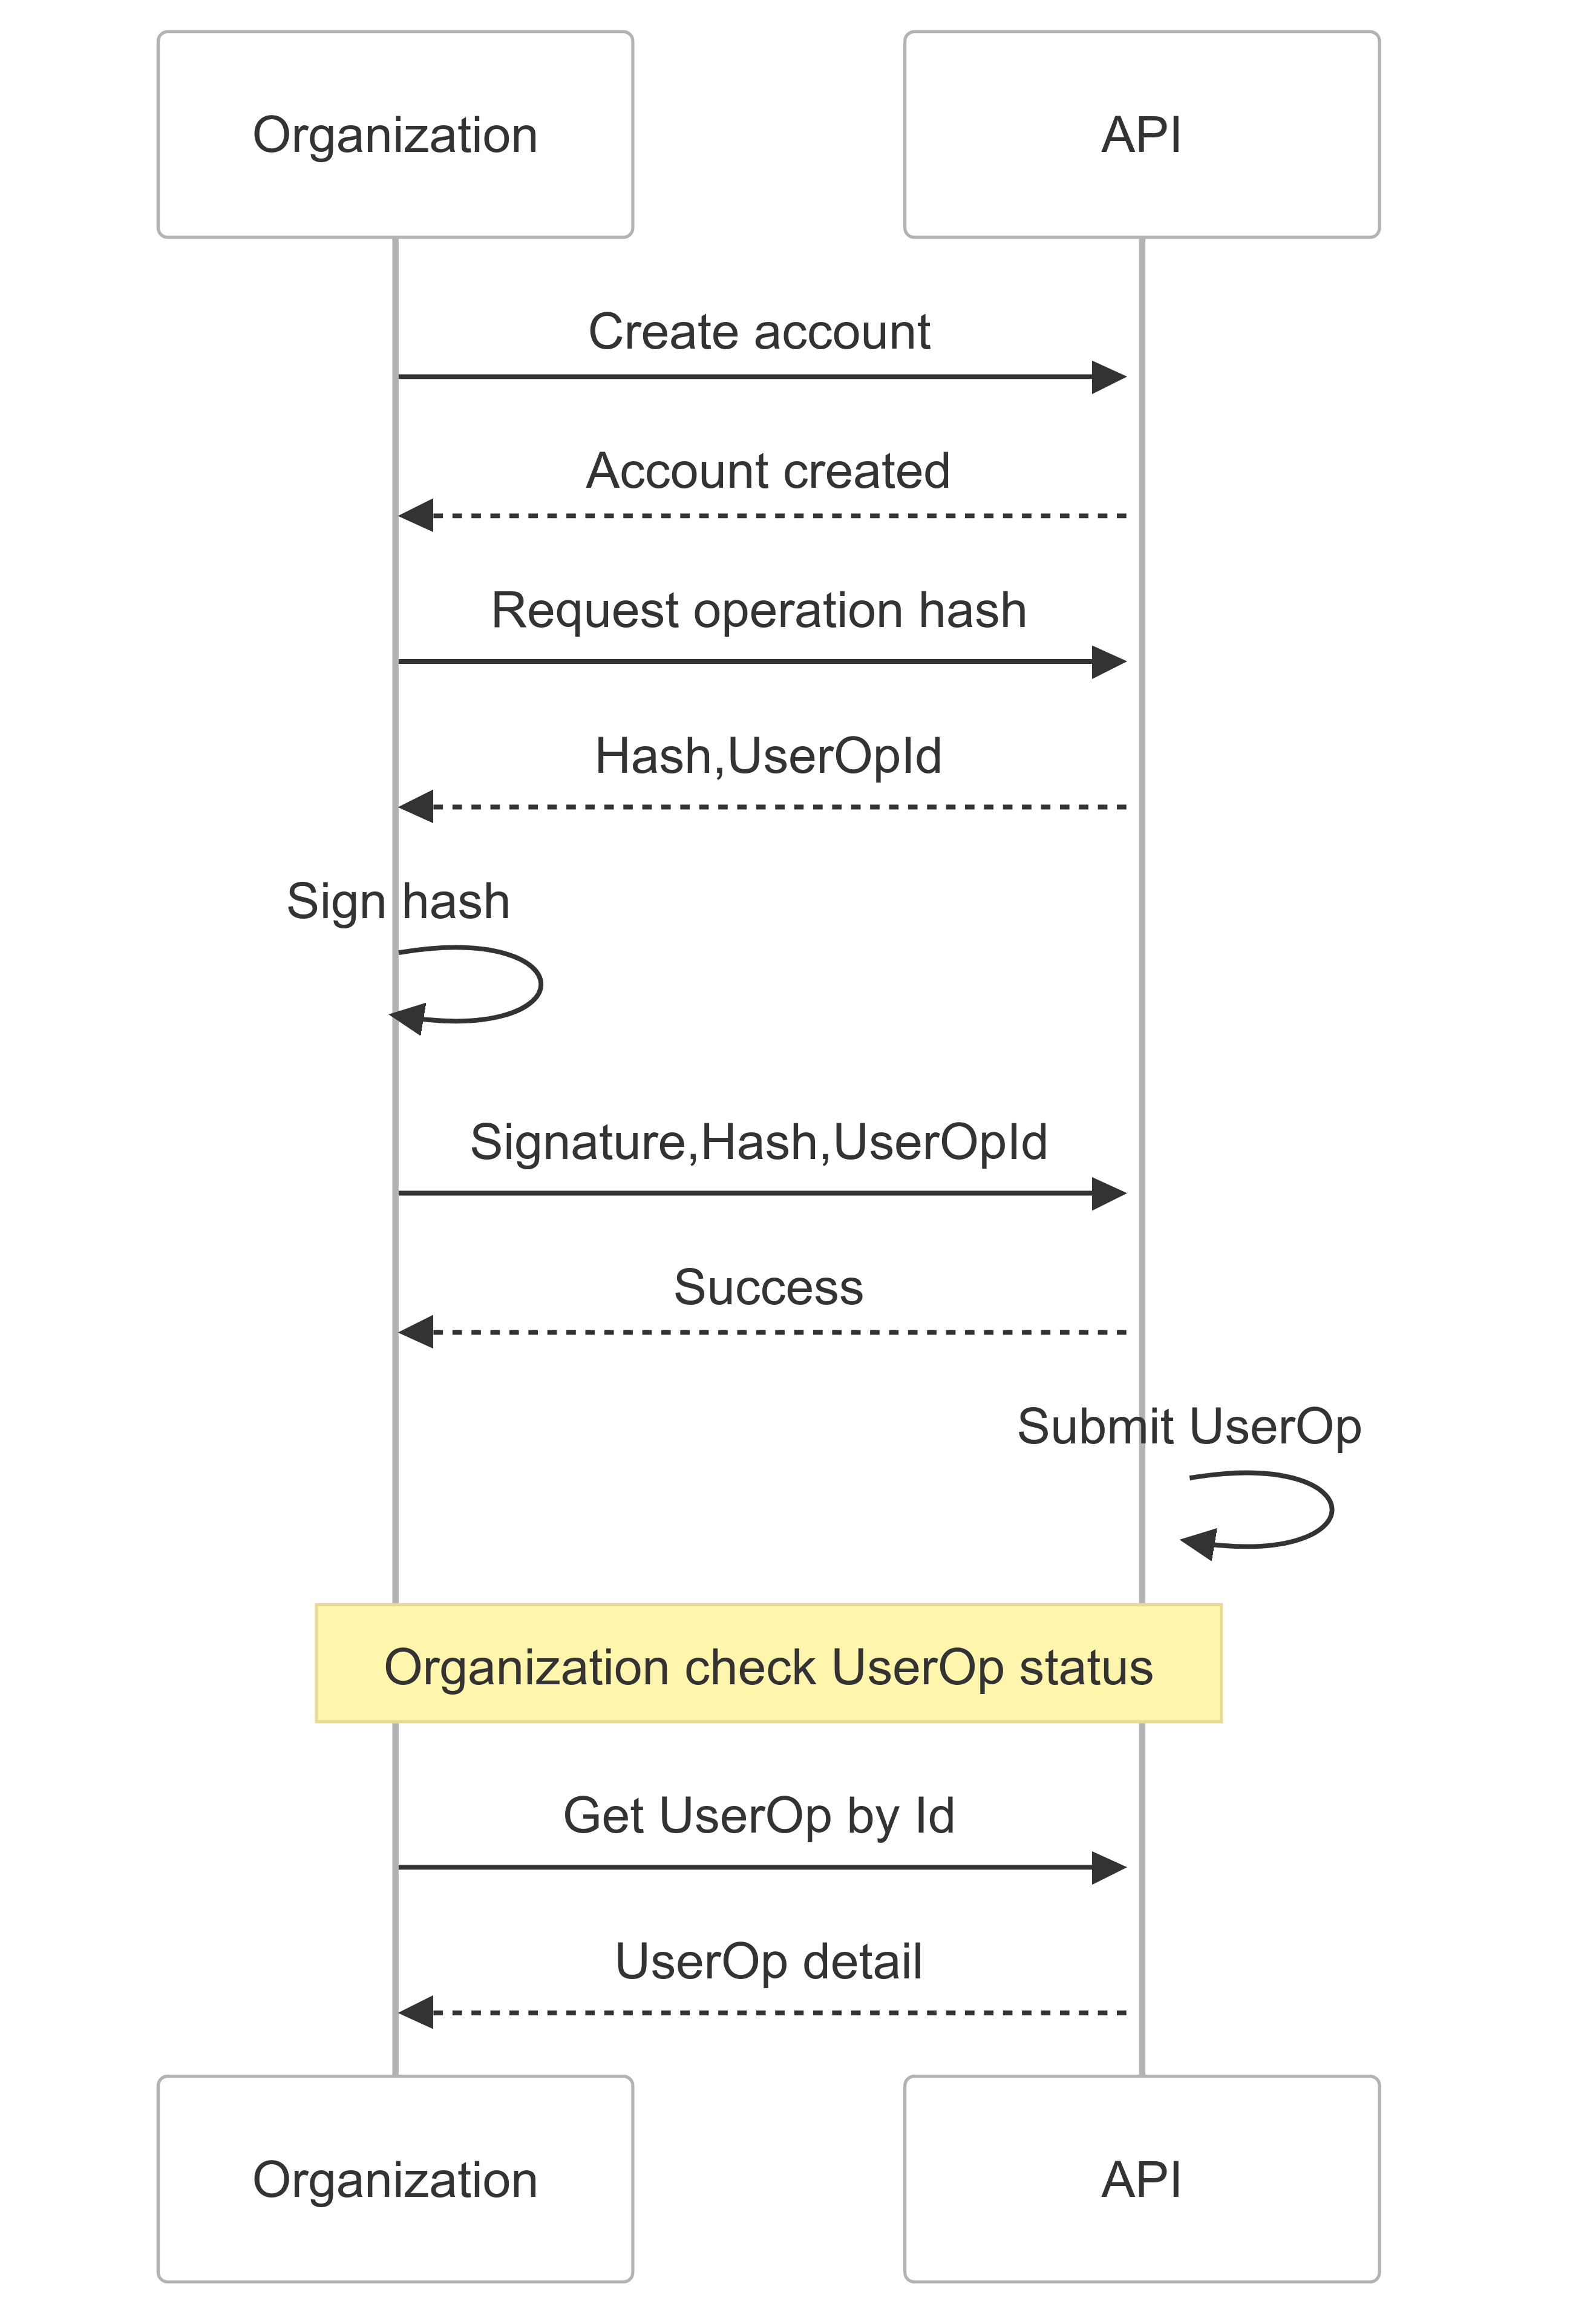
The process for executing a user operation involves the following steps:
-
Request Operation Hash
- Call the API to request a user operation hash
- Available user operation types refer to API documentation
- API returns:
- Hash that needs to be signed
- User operation ID for tracking
-
Sign the Hash
- Owner must sign the operation hash using personalSign
- The signing wallet must be the owner address of the account
-
Submit Operation
- Submit to the API:
- Original hash
- User operation ID
- Owner's signature
- Submit to the API:
-
Monitor Operation Status
- Check operation status periodically through the API
- API will indicate when operation is complete
- Transaction hash will be provided once confirmed
-
Important Notes
- Account must be activated before executing operations
- Only the owner address can sign operation hashes
- Invalid signatures will cause operations to fail
- Sufficient gas must be available in the gas tank
3. User Operation Status Life Cycle
The life cycle of a user operation is illustrated below:
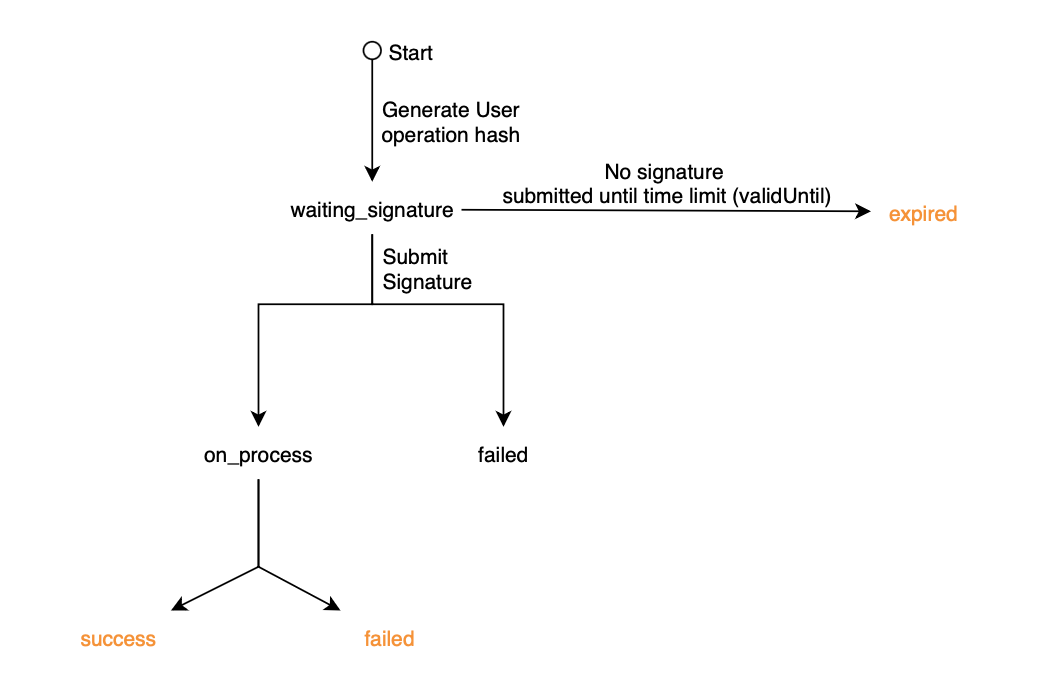
Note: The orange highlighted events (
expired,success,failed) will be sent to your webhook for real-time status updates.
Explanation:
- The process starts with generating a user operation hash.
- The operation enters a
waiting_signaturestate, waiting for the owner's signature. - If no signature is submitted before the time limit (
validUntil), the operation expires. - If a signature is submitted, the operation moves to
on_processorfailed. - An operation in
on_processwill eventually result in eithersuccessorfailed.
4. How to Sign a User Operation Hash
To authorize a user operation, the owner must sign the operation hash using their wallet. Below is an example using the Xellar SDK and ethers.js:
import * as ethers from "ethers";
import { Network, XellarSDK } from "../src";

const generatePersonalSignHash = (data: string) => {
  // Convert hex string to bytes
  const bytes = ethers.getBytes(data);

  // Create the Ethereum signed message prefix
  const prefix = `\x19Ethereum Signed Message:\n${bytes.length}`;

  // Calculate the keccak256 hash
  const resultHash = ethers.keccak256(
    ethers.concat([ethers.toUtf8Bytes(prefix), bytes])
  );

  return resultHash;
};

export async function activateAccount(accountId: string): Promise<void> {
  const xellar = new XellarSDK({
    clientSecret: process.env.XELLAR_CLIENT_SECRET!,
    appId: process.env.XELLAR_APP_ID!,
  });

  const { userOpId, hash } = await xellar.accountAbstraction.create.activate(
    accountId
  );

  const personalSignHash = generatePersonalSignHash(hash);

  const ownerSignature = await xellar.wallet.signHash({
    hash: personalSignHash,
    walletToken: "your wallet token",
    refreshToken: "your refresh token",
    network: Network.POLYGON, // adjust this
  });

  // Submit the signed user operation
  await xellar.accountAbstraction.submitUserOp({
    userOpId,
    hash,
    signature: ownerSignature.signature,
    isSponsored: true,
  });
}
Key Points:
- Always use the correct hash format for signing (see
generatePersonalSignHash). - The signature must be generated by the account owner's wallet.
- After signing, submit the signature and hash to the Xellar API/SDK to complete the user operation.