Configuring OAuth on Dashboard
Setting up Google Auth
To white-label the Google Oauth screen on Xellar you need to retrieve your Google Cloud Client ID and input it into the Xellar Embedded API Service Dashboard.
Setting up OAuth consent screen
If you have already set up OAuth credentials and have an OAuth Client ID skip to Step 8
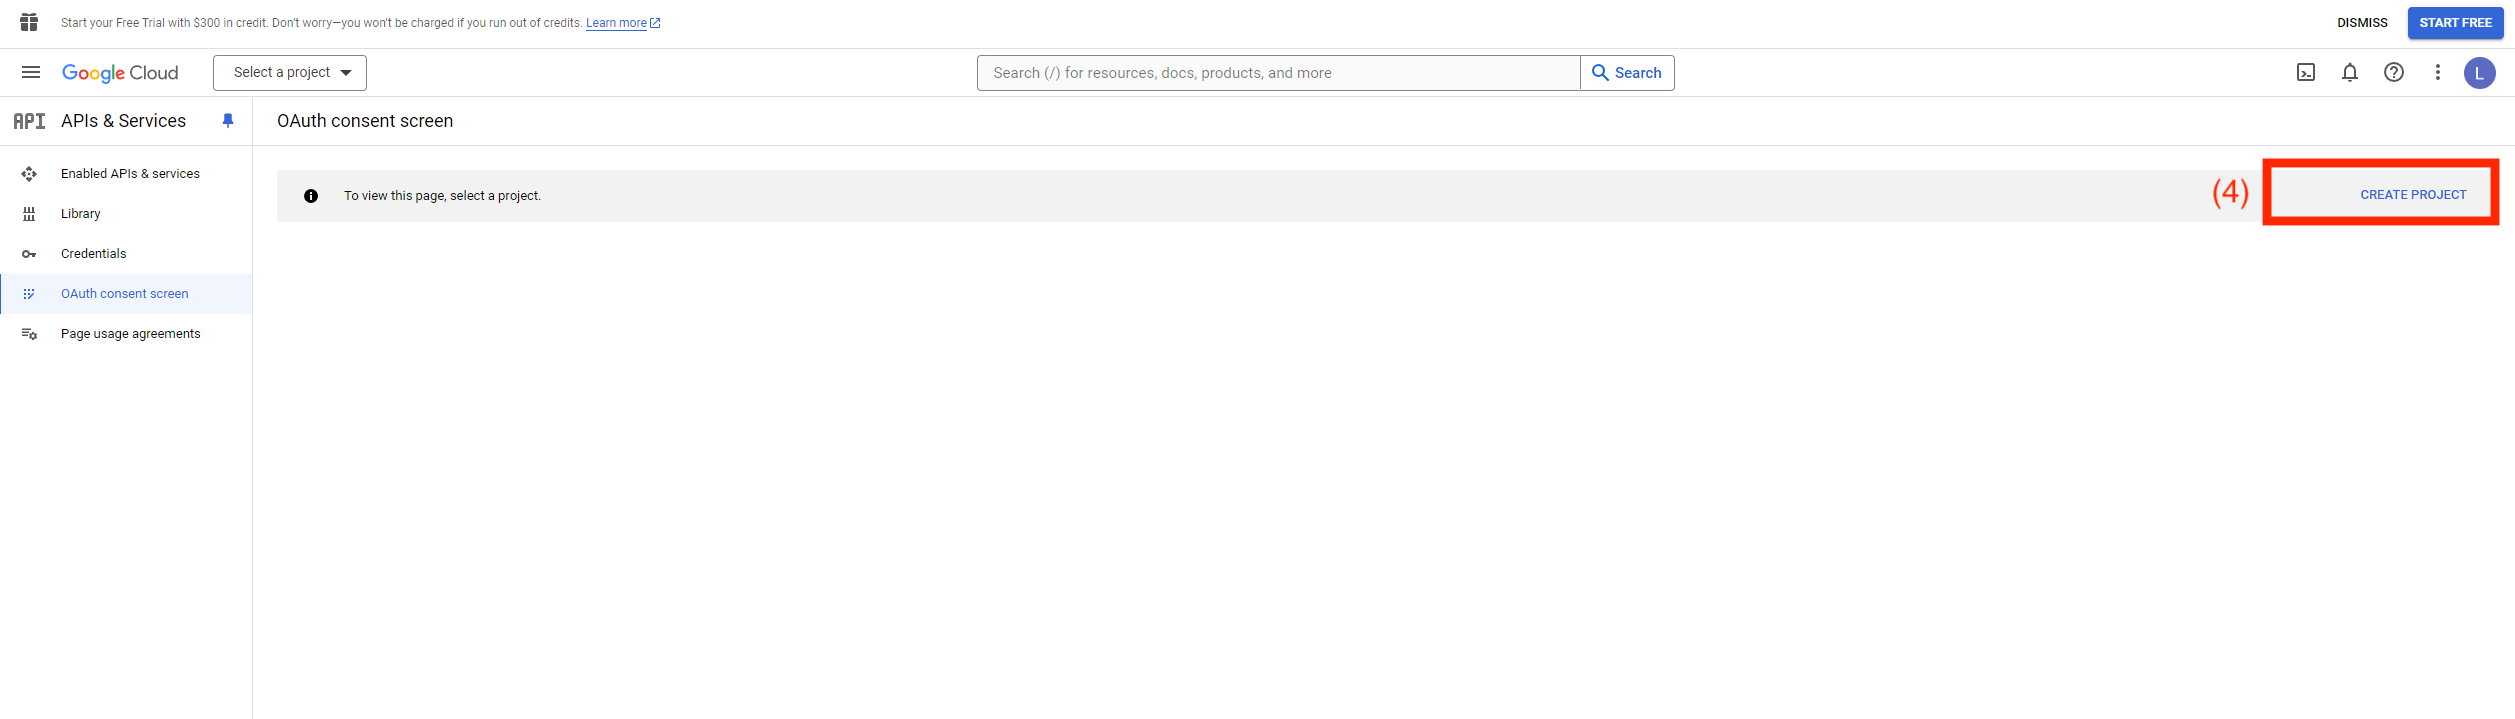
Step 1: Go to console.cloud.google.com (opens in a new tab) and select the navigation bar
Step 2: Go to APIs & Services Step 3: Select OAuth consent screen

Step 4: Create Project
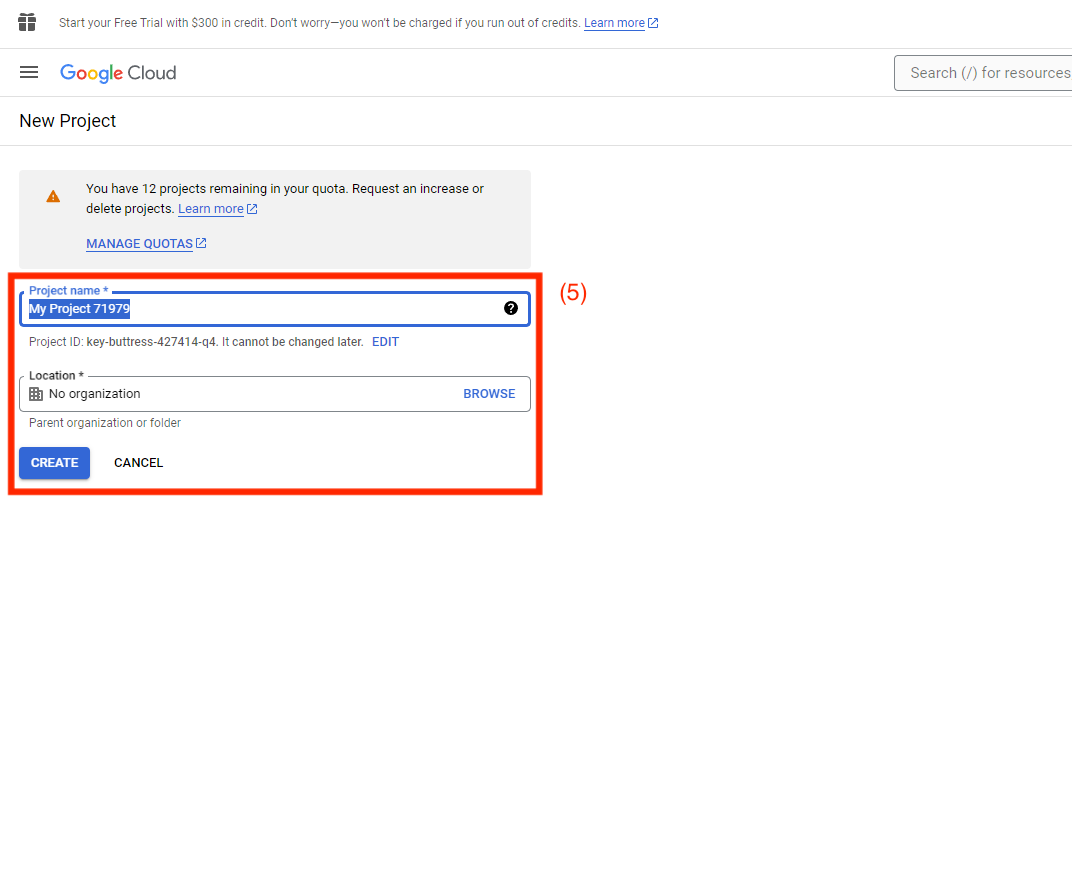
Step 5: Create New Project
Step 6: Select External User Type
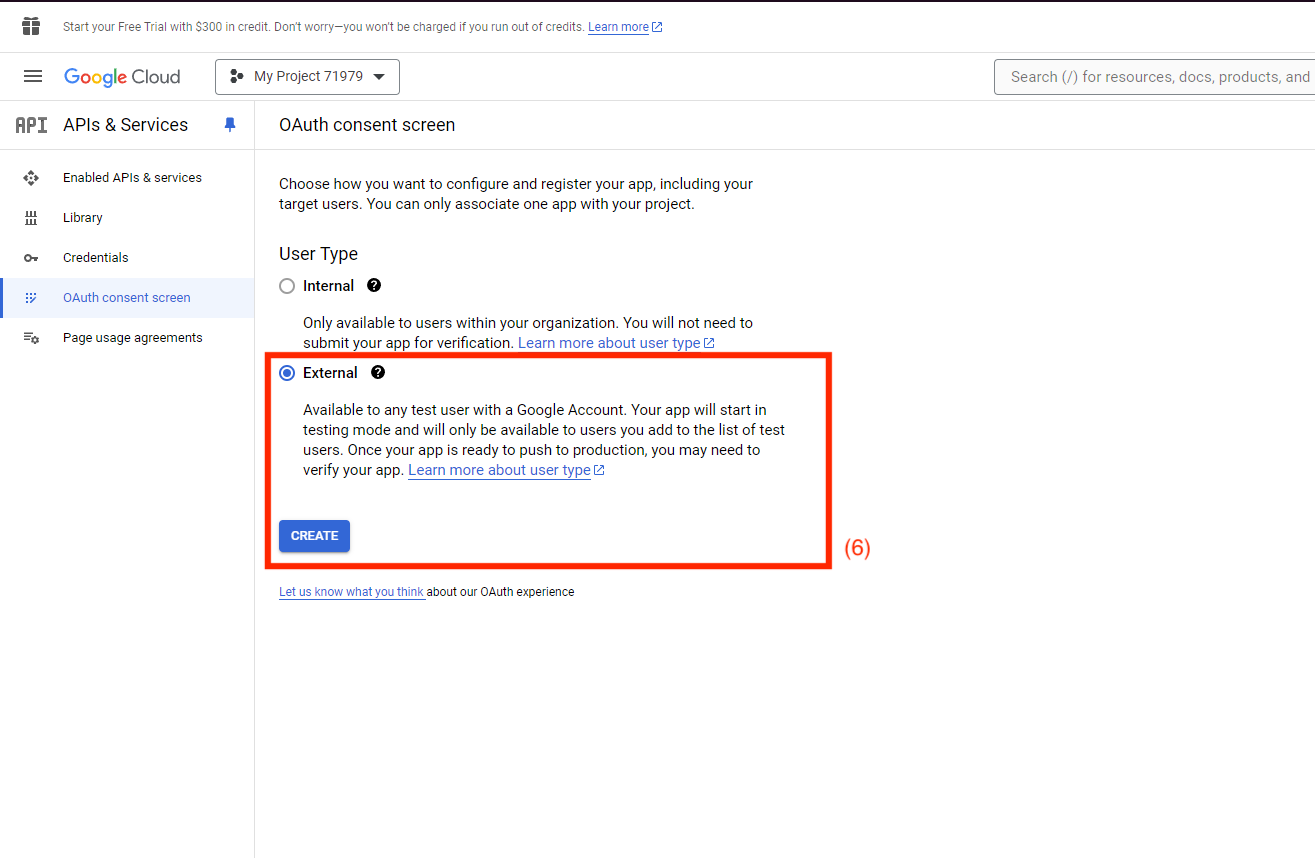
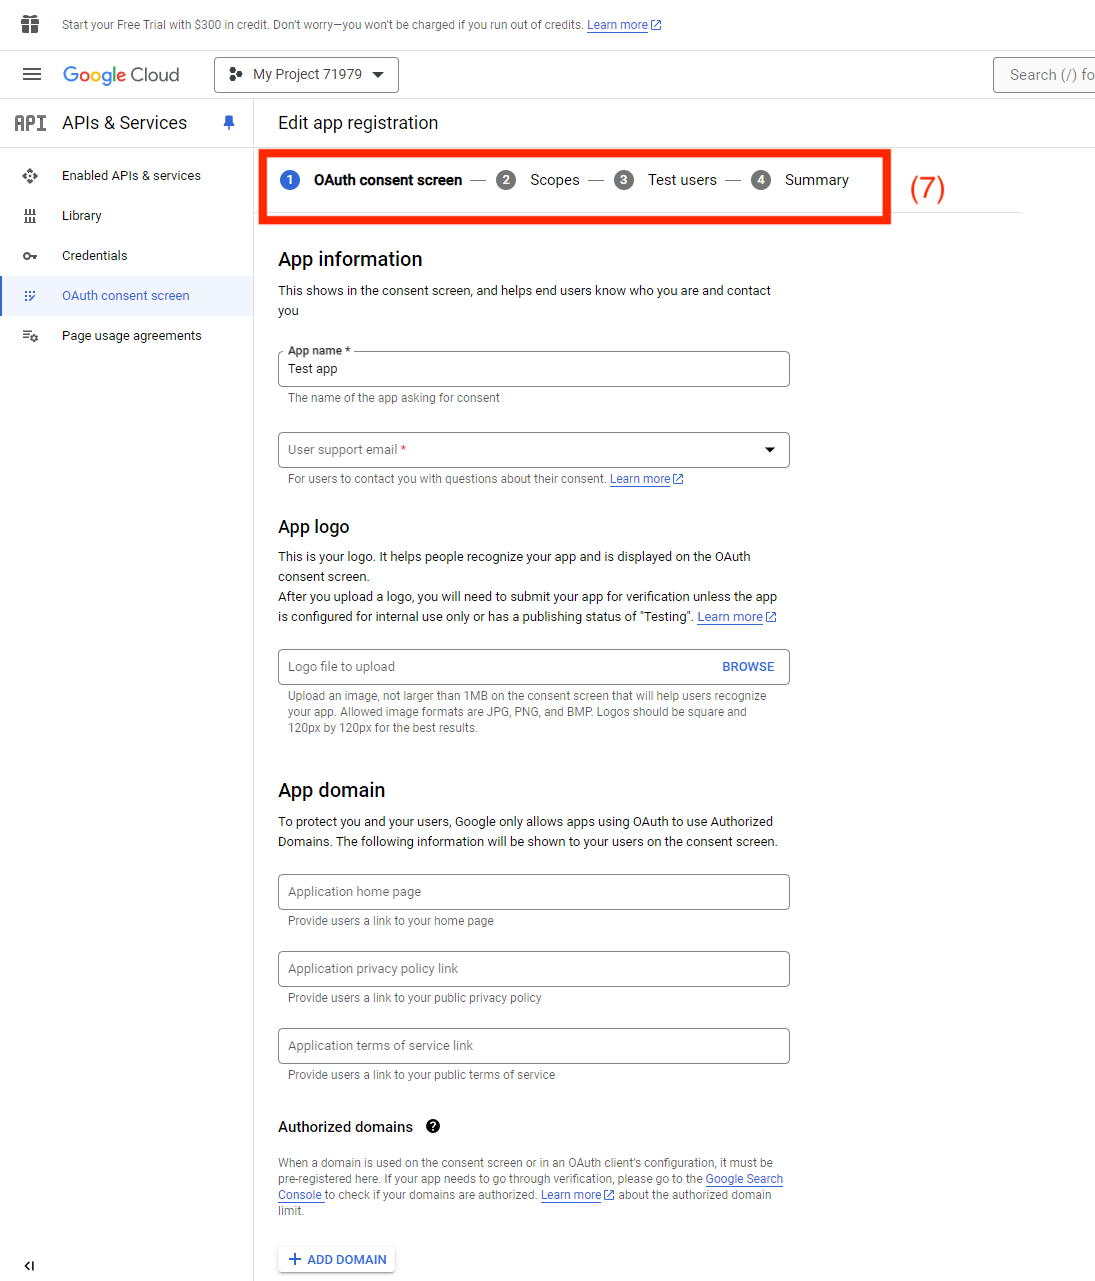
Step 7: Full registration until complete
Retrieving OAuth Client ID
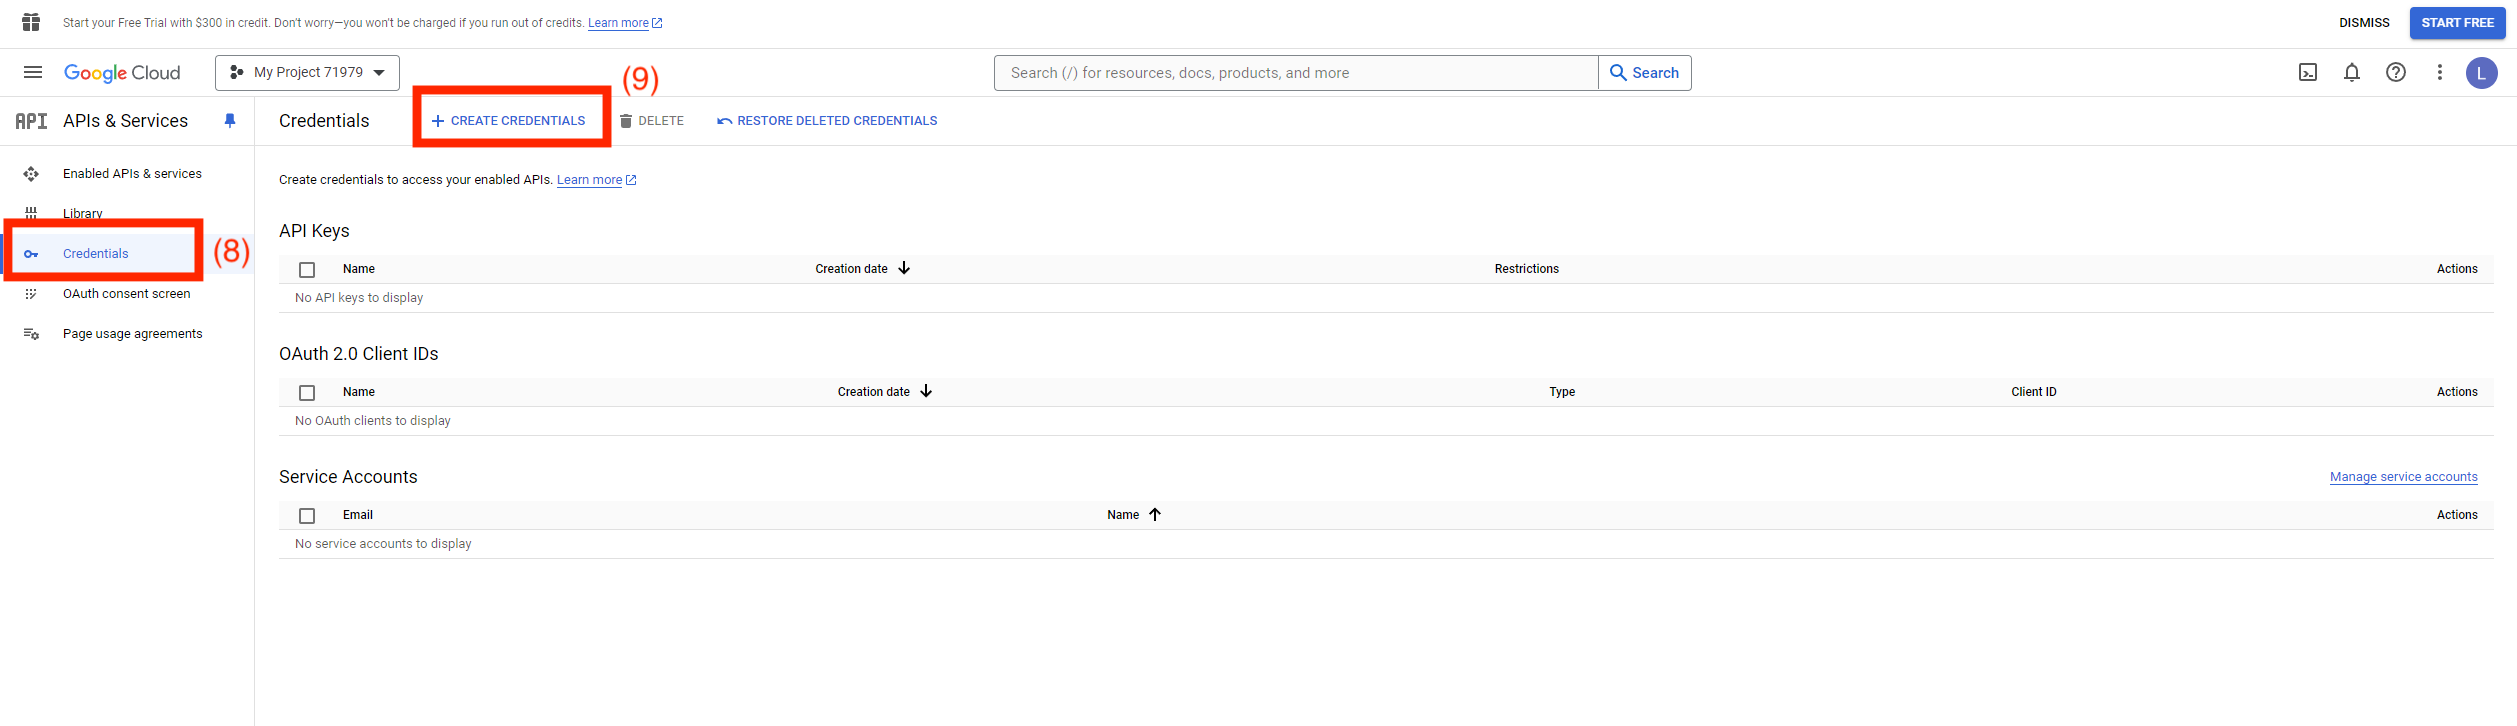
Step 8: Go to Credentials from Navigation Step 9: Select Create Credentials
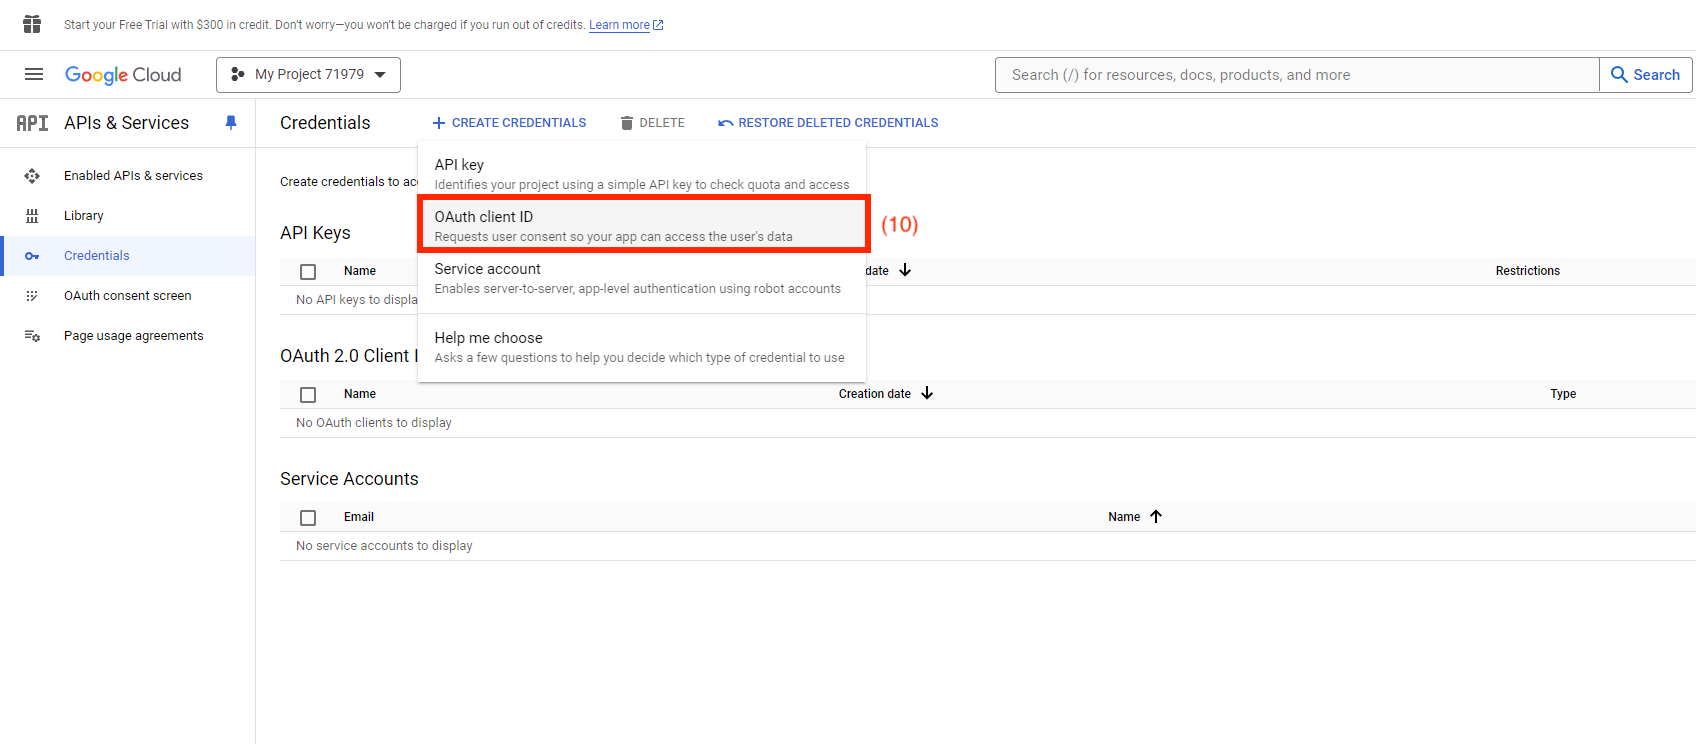
Step 10: Select OAuth client ID
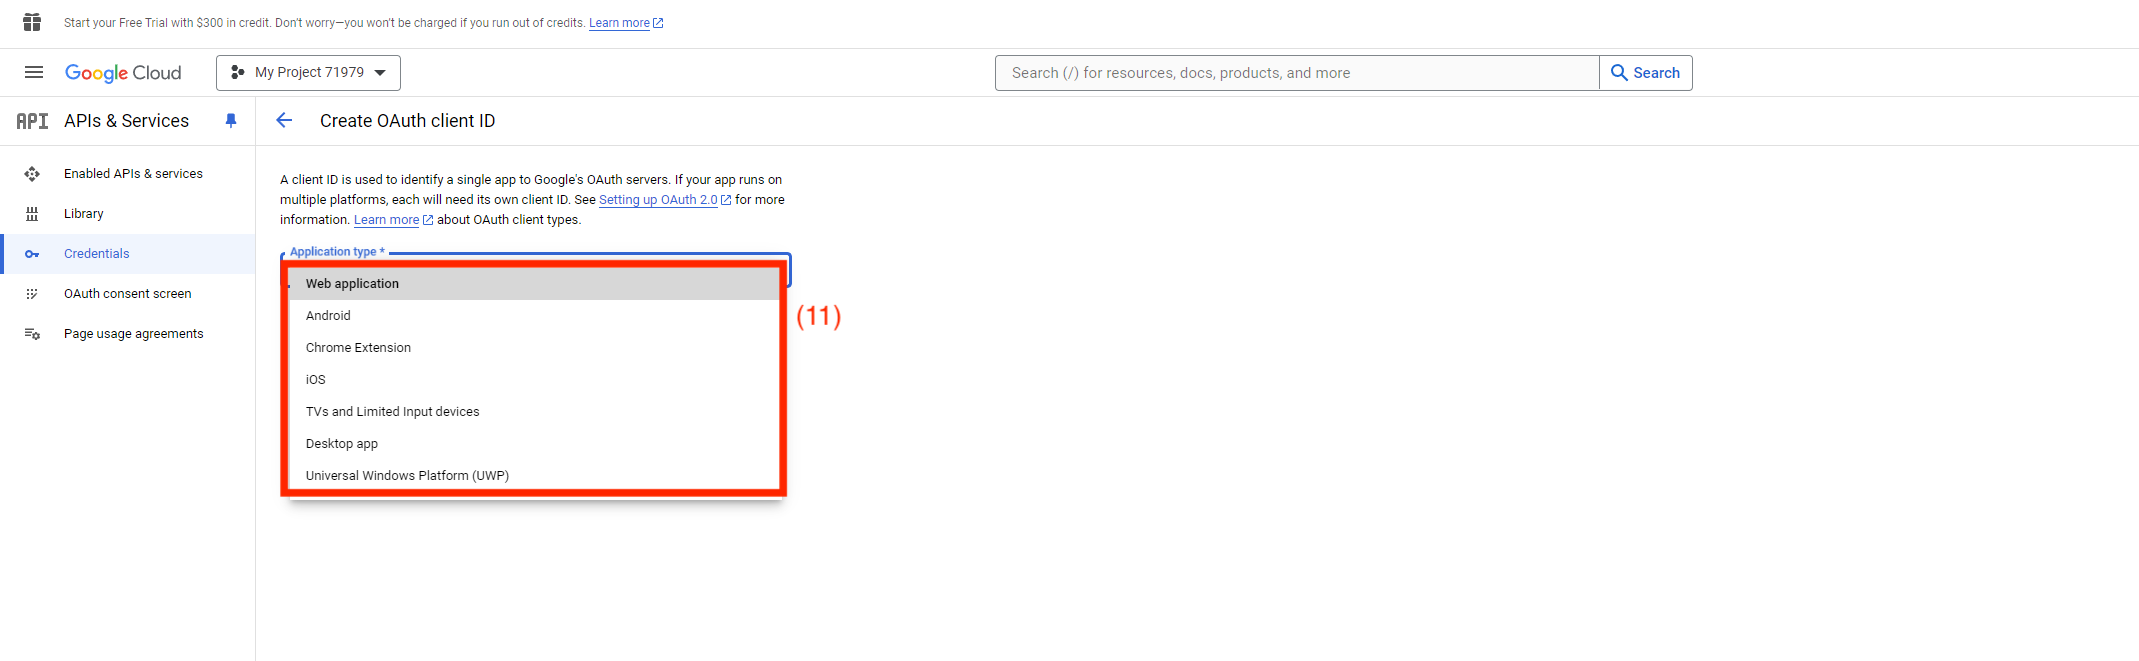
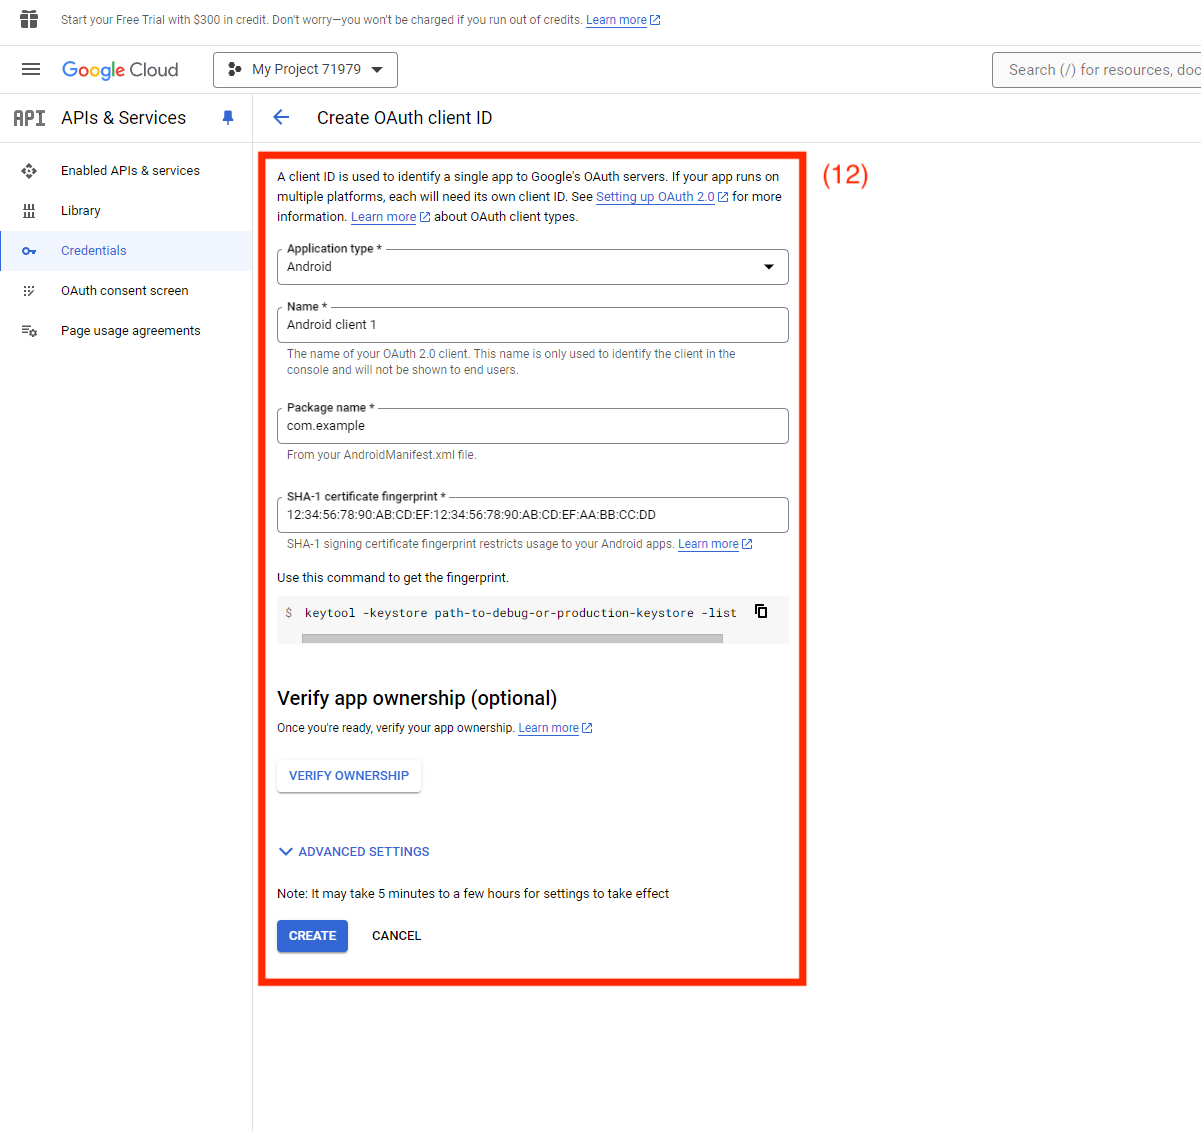
Step 11: Select Application Type
Step 12: Fill Out Details
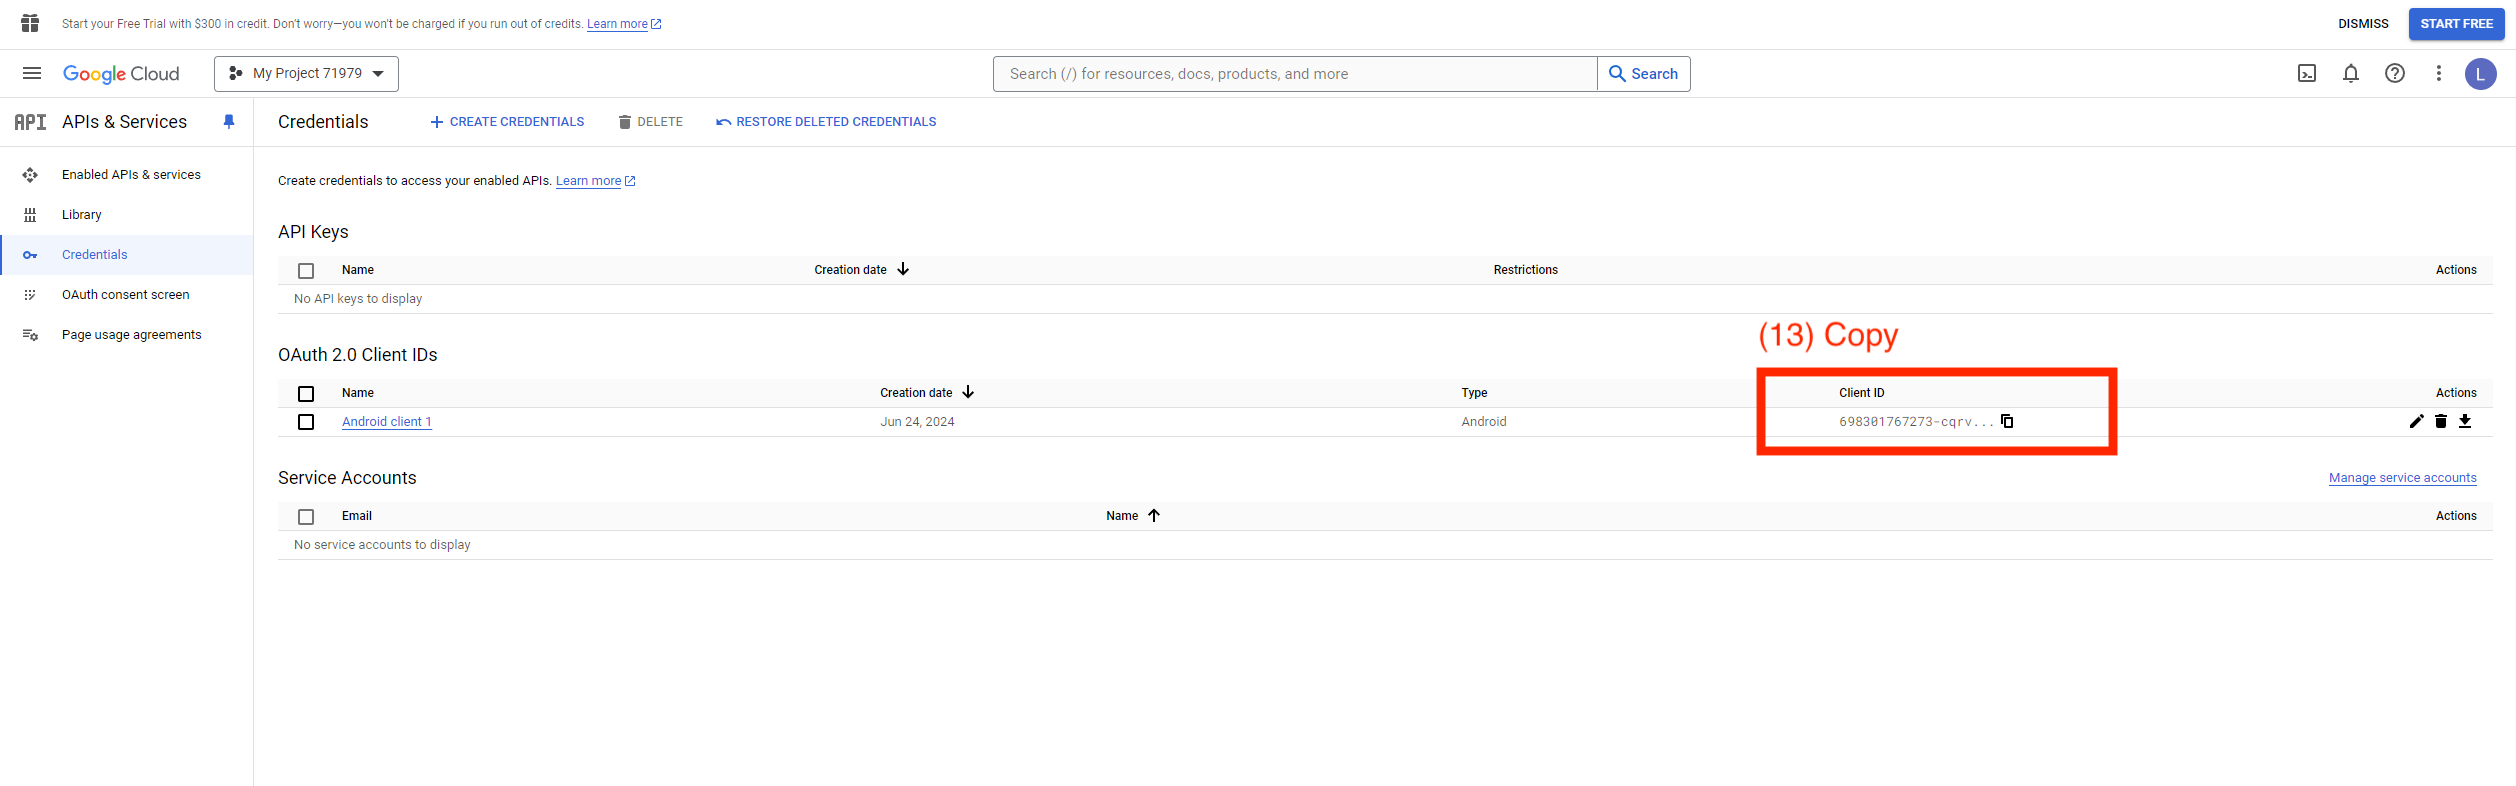
Step 13: Copy Client ID
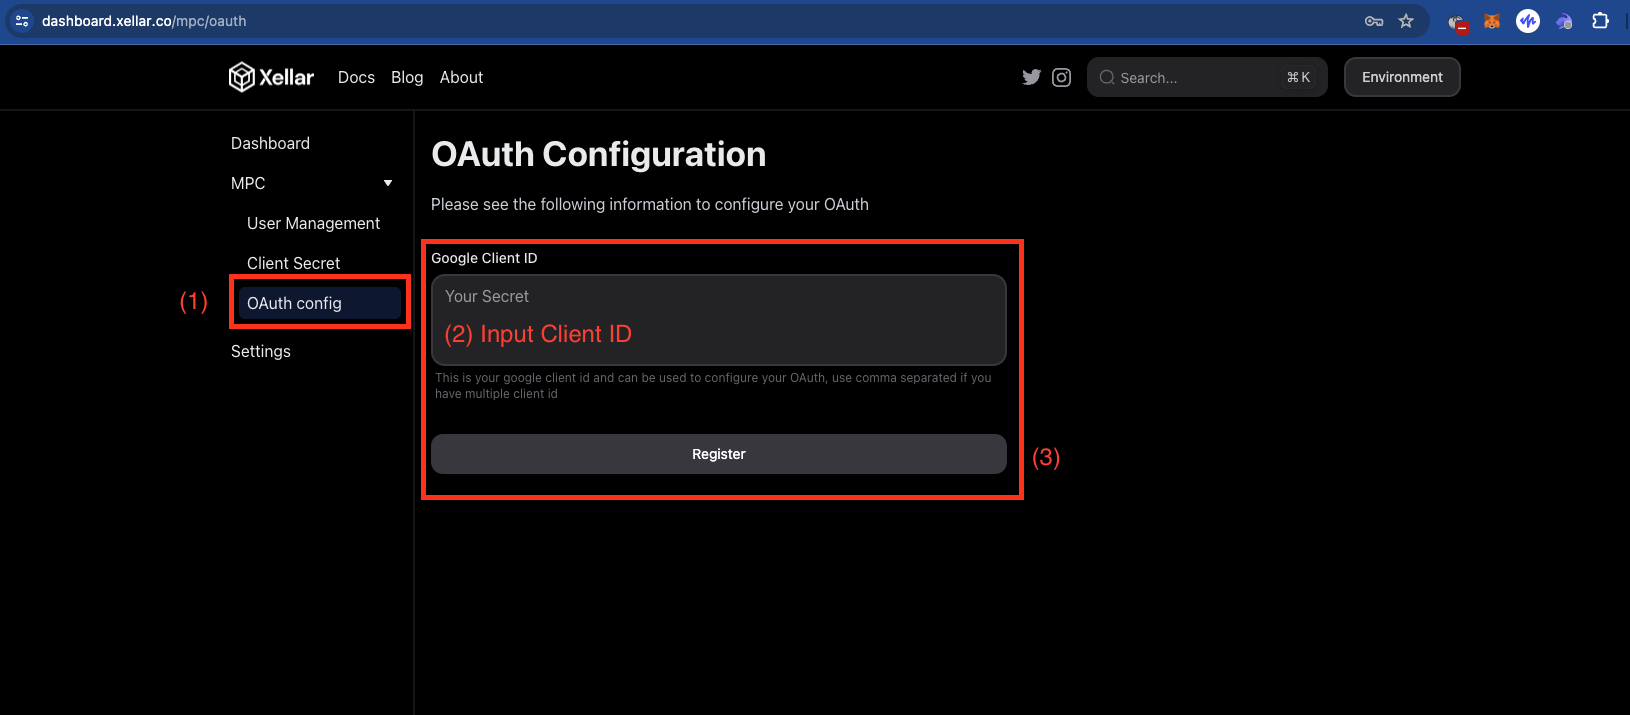
Registering OAuth Client ID
Step 1: Select OAuth config
Step 2: Input Client ID from Google Cloud Console
Step 3: Press Register