Custom Connect Button
There are two ways to customize the connect button.
1. Customize via ConnectButton.Custom
<ConnectButton.Custom>
  {({
    openConnectModal,
    disconnect,
    isConnected,
    openChainModal,
    openProfileModal,
    account,
    chain,
  }) => <button onClick={openConnectModal}>Connect</button>}
</ConnectButton.Custom>
2. Show The Connect Modal with useConnectModal hooks
const { open } = useConnectModal();

<button onClick={open}>Connect</button>;
Custom Branding
📝
Available in version 2.2.1 and above
From version 2.2.0, you can now customize the branding of the Xellar Kit modal.
- Go To Service Menu
- Go To Embedded Wallets Menu
- Clik On Wallet Config Tab
- Then you can switch off the
Show Xellar Brandtoggle button to remove the Xellar branding from the modal. - Upload your logo
- Done!
You can also set custom height of the logo by passing the customLogoHeight prop to the XellarKitProvider component.
<WagmiProvider config={config}>
  <QueryClientProvider client={queryClient}>
    <XellarKitProvider
      customLogoHeight={42} // 👈 Add Here
    >
      {children}
    </XellarKitProvider>
  </QueryClientProvider>
</WagmiProvider>
Smart Account Usage
🔧
Smart Account functionality requires activation in the dashboard first
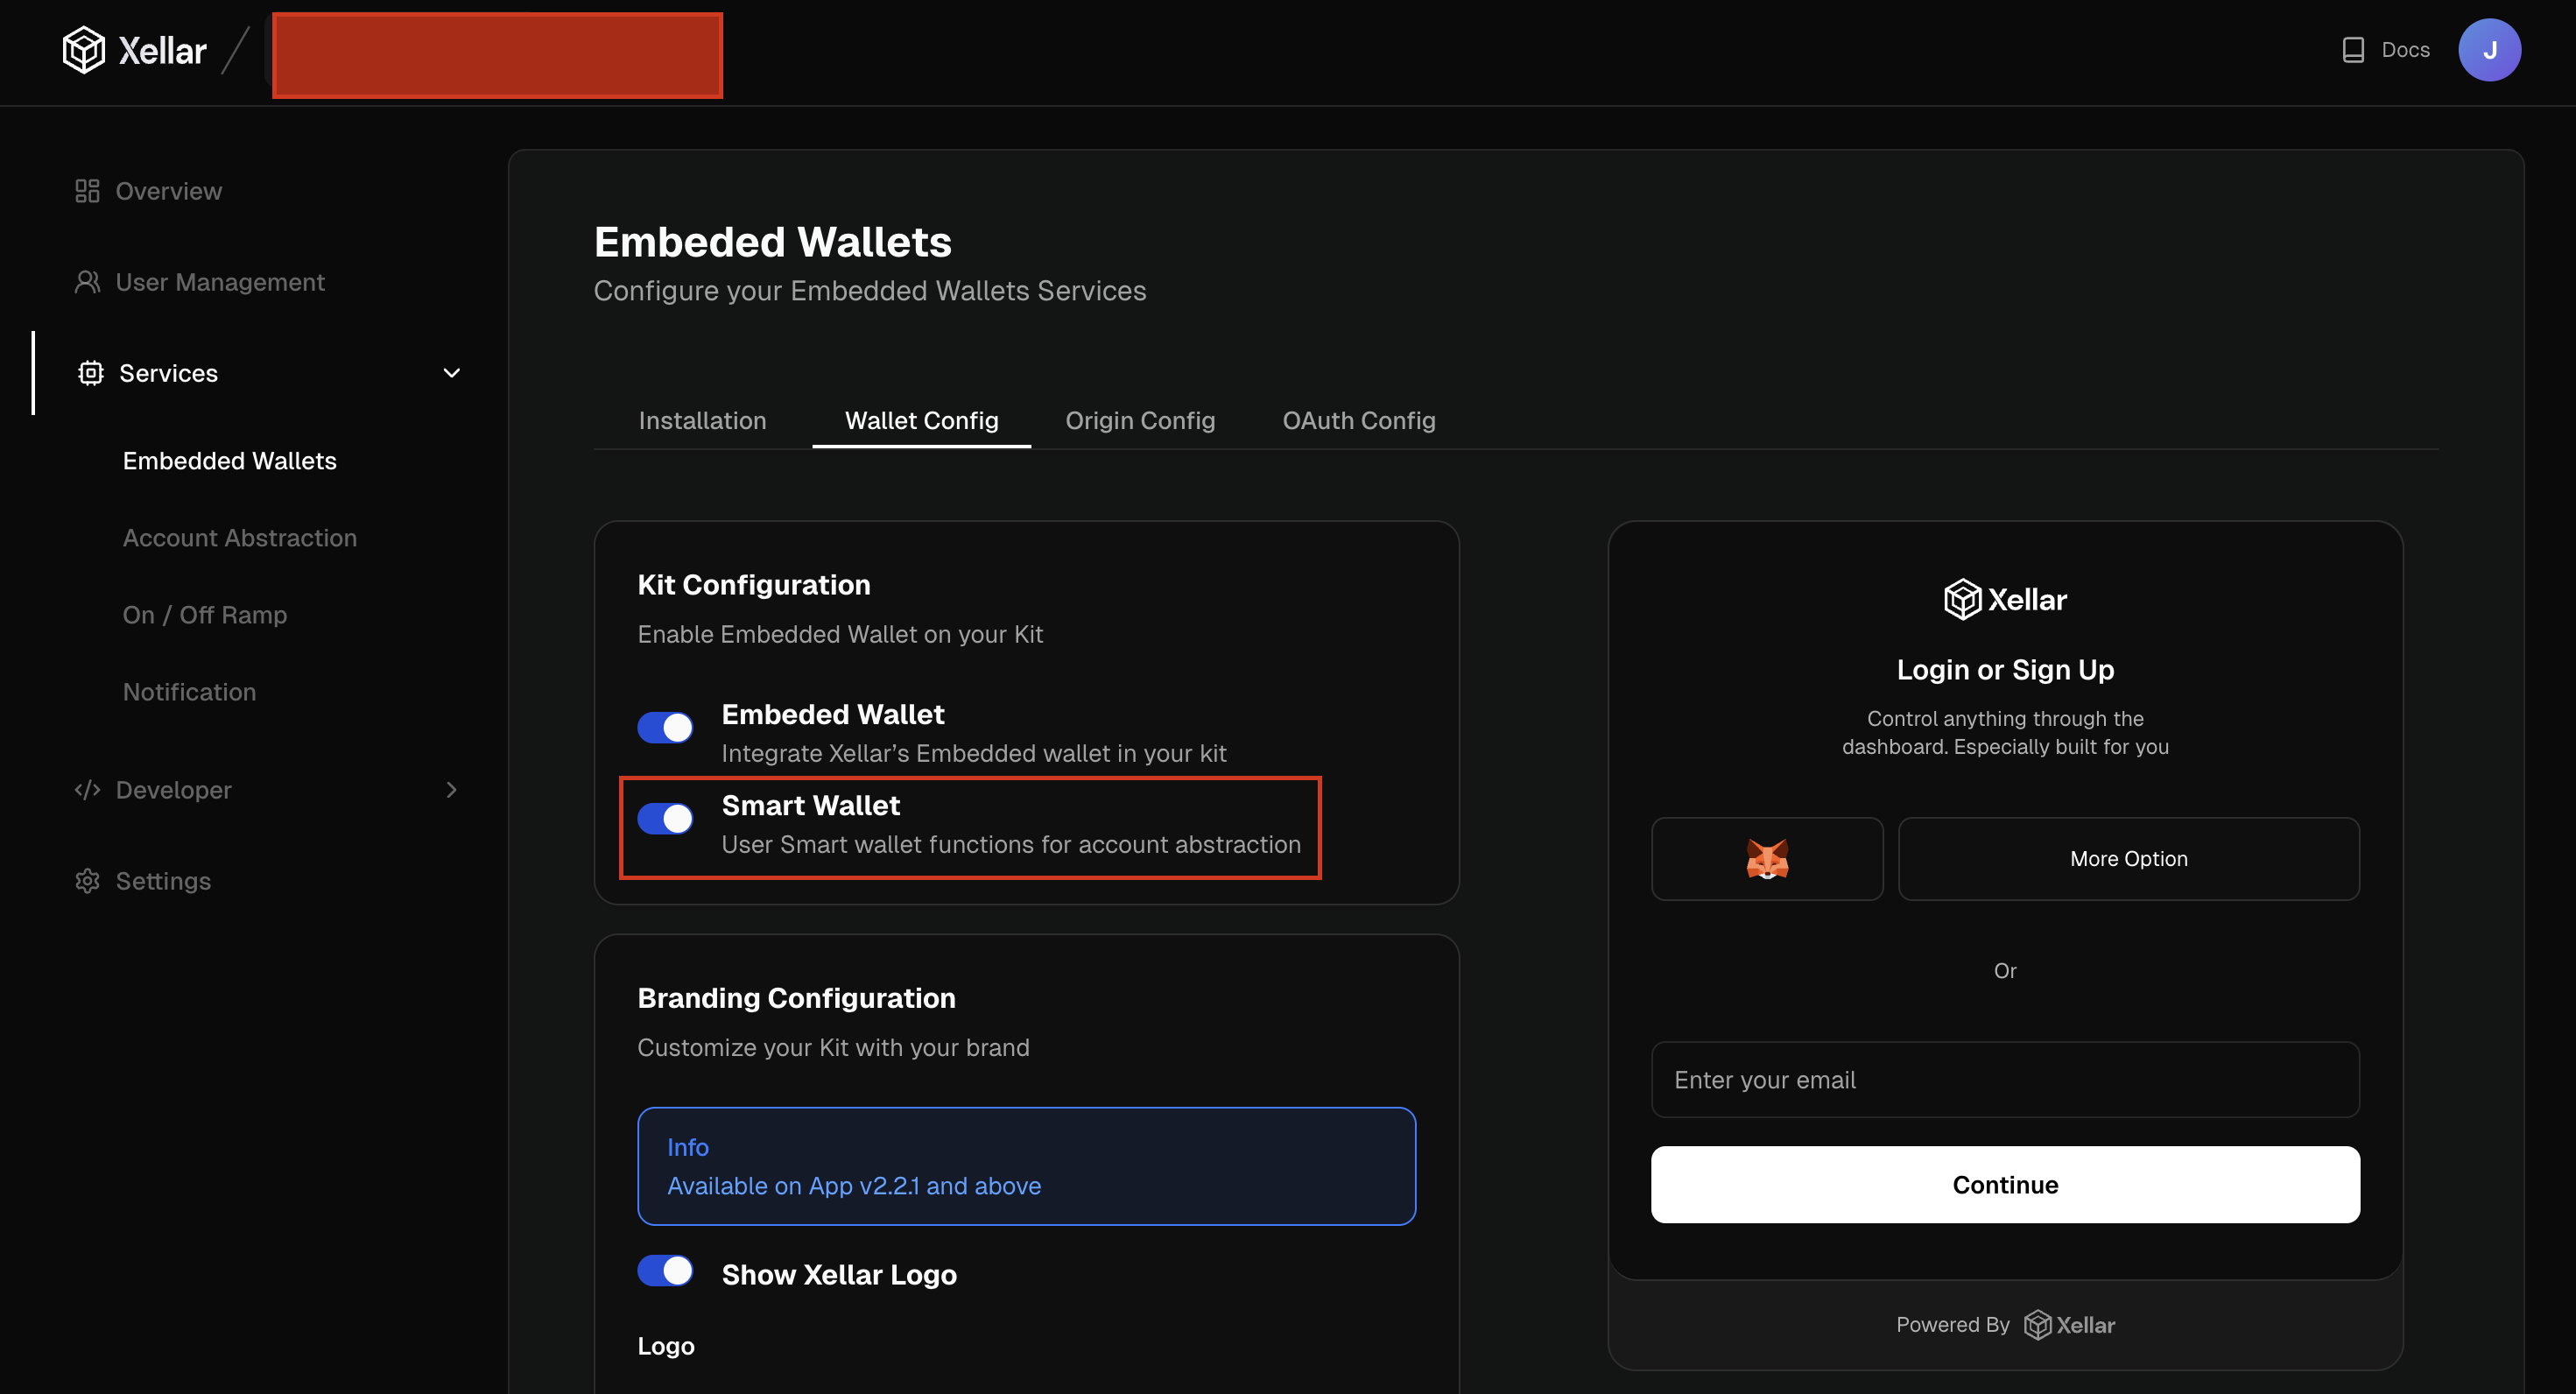
Activation Setup
Before using Smart Account features, you need to activate it in your dashboard:
- Go to your Dashboard
- Navigate to Services > Embedded Wallets > Wallet Config section
- Enable Smart Wallet functionality
- Navigate to Services > Account Abstraction
- Enable the service

Using Smart Account Hook
Once activated, you can use the useSmartAccount hook to interact with smart accounts:
import { useSmartAccount } from "@xellar/kit";

const { activateAccount, getOrCreateAccount, signTransaction, smartAccount } =
  useSmartAccount();
Available Methods
activateAccount: Activates a smart account for the connected usergetOrCreateAccount: Retrieves existing account or creates a new onesignTransaction: Signs transactions using the smart accountsmartAccount: Returns the current smart account instance
Example Usage
import { useSmartAccount } from "@xellar/kit";

function SmartAccountComponent() {
  const { activateAccount, getOrCreateAccount, signTransaction, smartAccount } =
    useSmartAccount();

  const handleActivate = async () => {
    try {
      await activateAccount();
      console.log("Smart account activated successfully");
    } catch (error) {
      console.error("Failed to activate smart account:", error);
    }
  };

  const handleSignTransaction = async (transaction) => {
    try {
      const signedTx = await signTransaction(transaction);
      console.log("Transaction signed:", signedTx);
    } catch (error) {
      console.error("Failed to sign transaction:", error);
    }
  };

  return (
    <div>
      <button onClick={handleActivate}>Activate Smart Account</button>
      <button onClick={() => handleSignTransaction(/* your transaction */)}>
        Sign Transaction
      </button>
    </div>
  );
}